Accept 2 Checkout Payments Using Contact Form 7
Overview
Description
The ‘Accept 2Checkout Payments Using Contact Form 7’ plugin empowers users to seamlessly accept secure 2Checkout payments through Contact Form 7 on their WordPress website. This plugin provides a straightforward and secure means of processing credit and debit card transactions without the need to handle sensitive payment information on your servers, as all data is securely managed by 2Checkout.
Plugin's purpose and benefits
- Currency Support - Supports payment options in 25 different currencies.
- Transaction Viewing (Free Version) - View up to 10 payment transactions in the admin panel.
- Multiple Payment Forms - Create and manage multiple payment forms using Contact Form 7.
- Multi-Form Support - Allows multiple forms to be used on a single post or page.
- Input Field Compatibility - Captures values from all input fields, including drop-down menus, textboxes, hidden fields, and radio buttons.
- Dynamic Value Acceptance - Accept dynamic values from the frontend for parameters like item description, amount, email, and quantity.
- 2Checkout Sandbox Mode - Option to enable Sandbox Mode for testing payment transactions.
- Data Storage - Saves Contact Form 7 payment data in the database.
- Admin Payment Data Viewing - View detailed 2Checkout payment data from the admin side.
- Data Export - Option to export Contact Form 7 payment data to CSV.
- Admin Filters & Search - Comprehensive filters and search functionality available in the admin panel.
- Email Notifications - Individual emails sent to both customers and admin after a 2Checkout payment transaction.
- Custom Redirect URLs - Set ‘Success Return URL’ and ‘Cancel Return URL’ pages for redirection after payment. Use the
[two-checkout-details]
shortcode to display payment details on these pages. - Country Field Tag - Use the Country field tag to display countries in a drop-down list with ISO 3166 format (e.g., GB, IE, DE). Recommended to use this tag for accurate country listing.
Get Started
Quick setup instructions


How To Use & Features
You have to configure it from wp-admin > Contact > Add/Edit Contact Forms (Contact Form 7 needs to be activated before) to use this plugin.
You will find a new tab, “2checkout," along with Form, Mail, Messages. Additional Settings,where you can make all settings related to the 2checkout plugin.
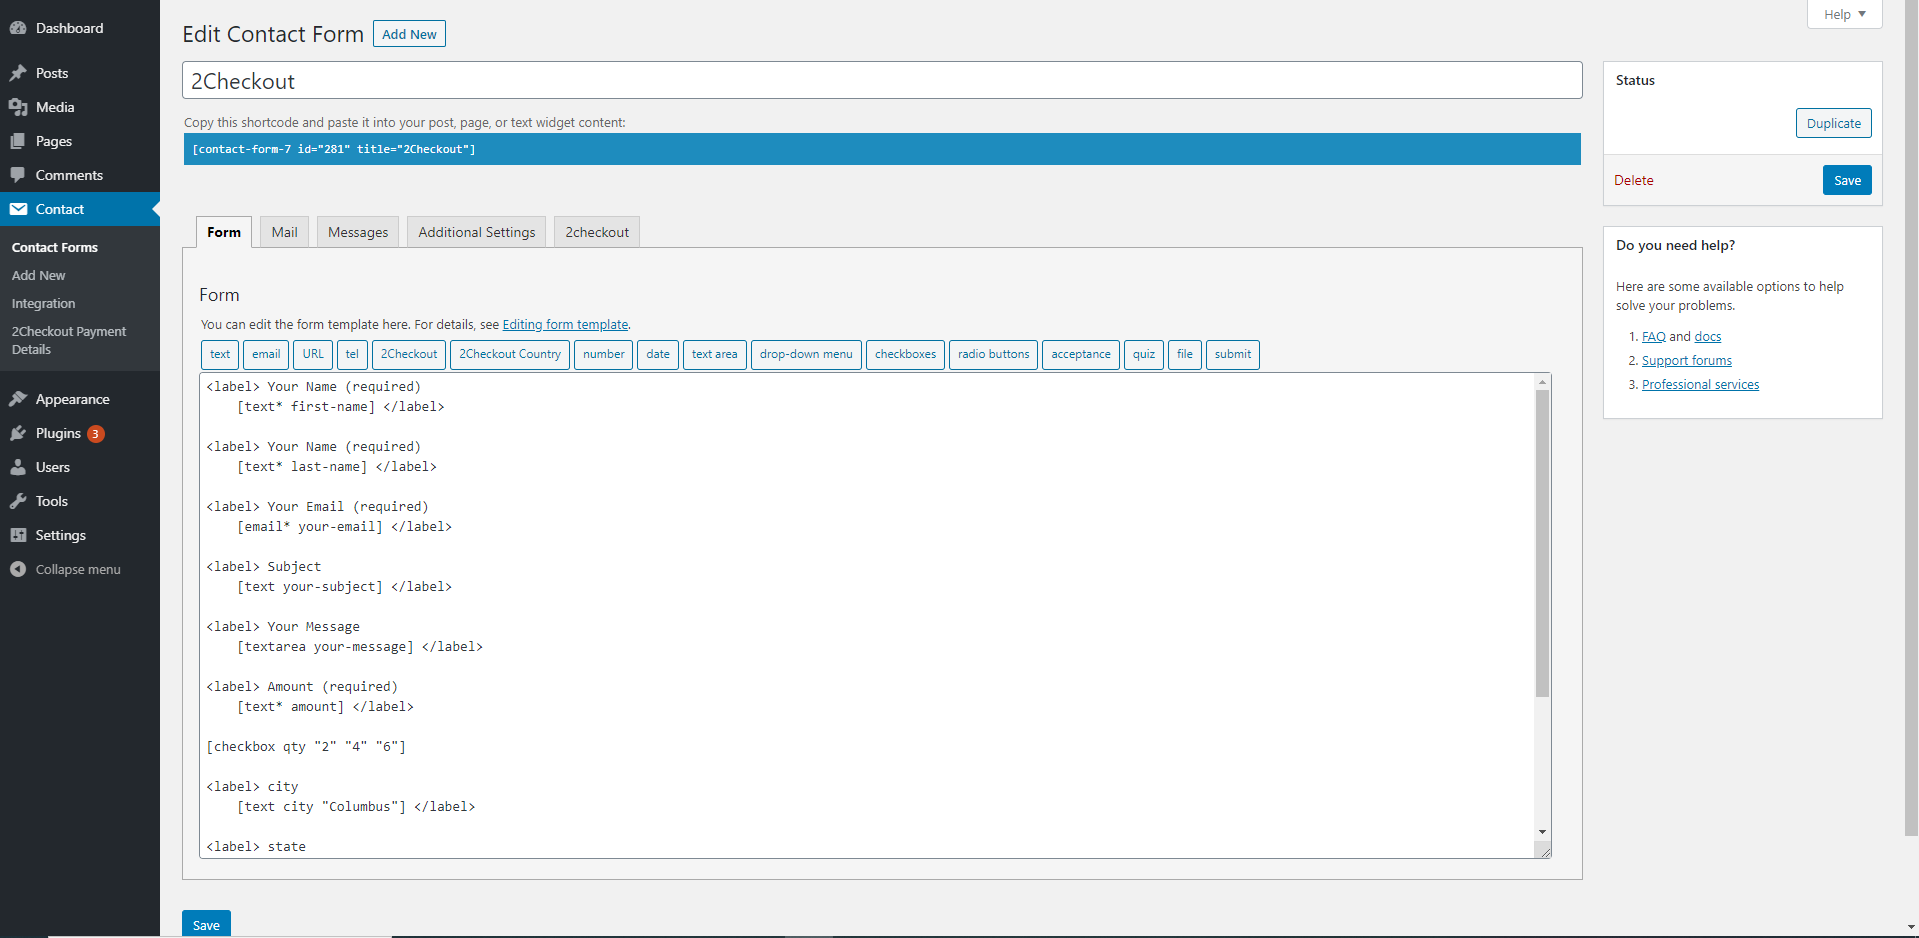
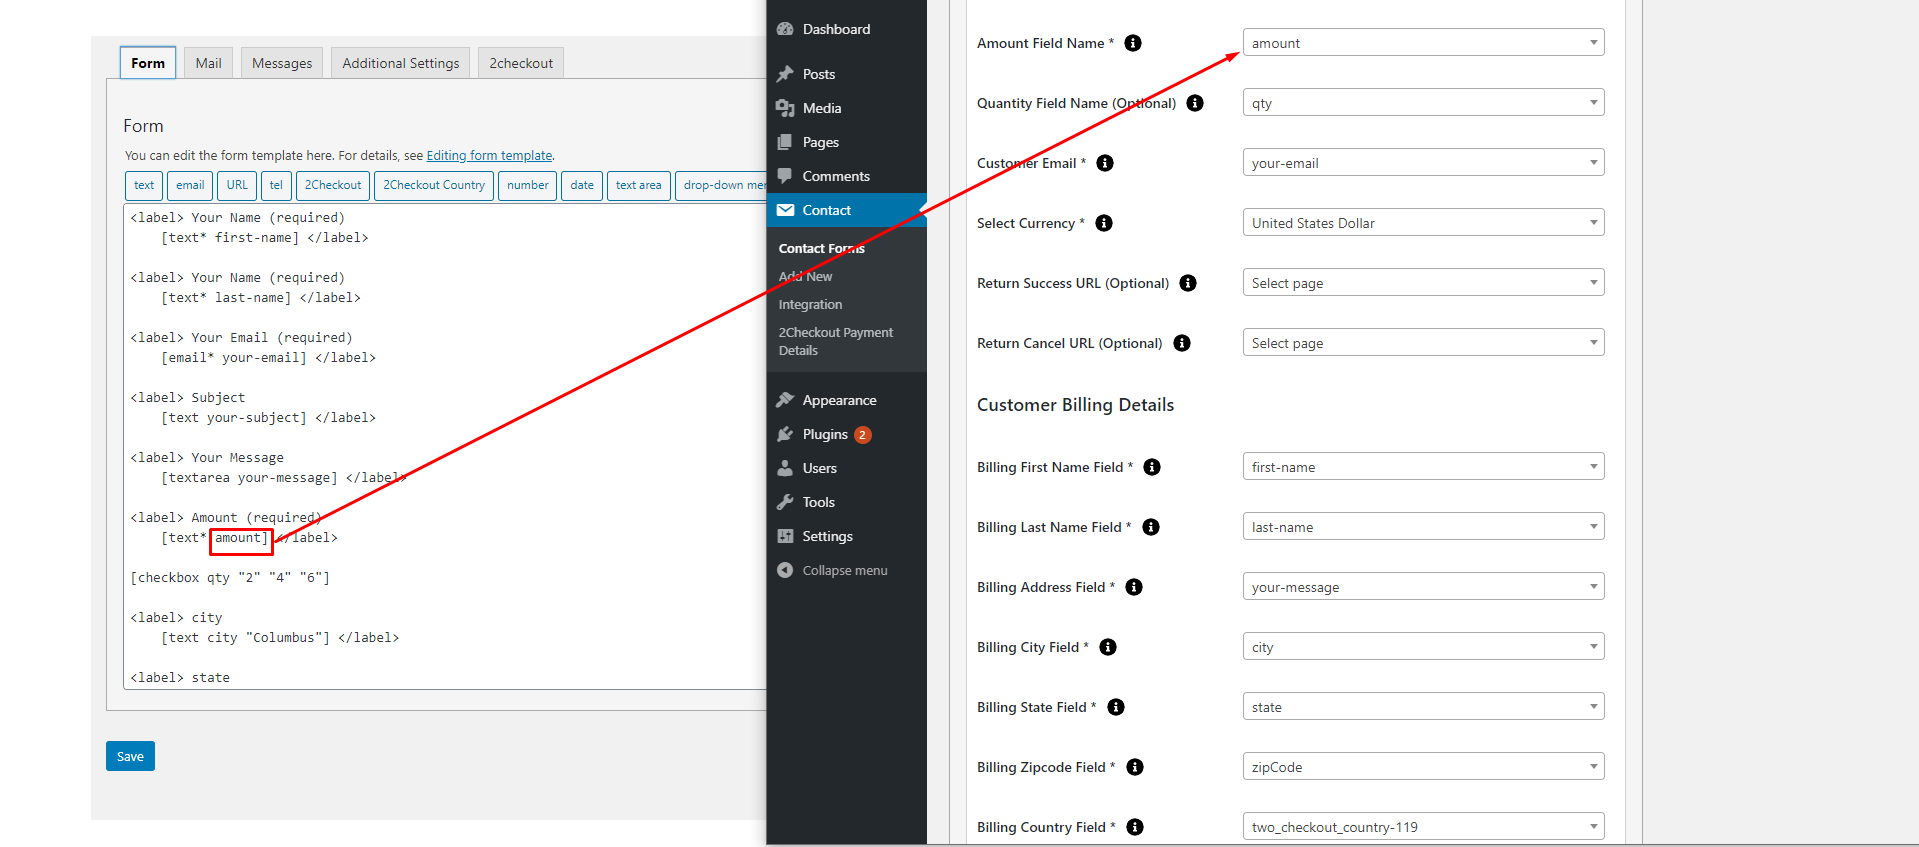
Note: You need to add the “2checkout & 2checkout Country" tag in your form. You will find a tag “2checkout" along with text, email, URL, etc.
To use the 2checkout option, first, you need to create and save form tags
You can use the Country field tag option to display the country in the drop-down. If you are going with the custom approach, you need to set the drop-down value in ISO 3166 ( Examples: GB,IE, and DE ), so we prefer to use our tag to display a country list.
For wp-admin > Contact > Contact Forms > 2checkout
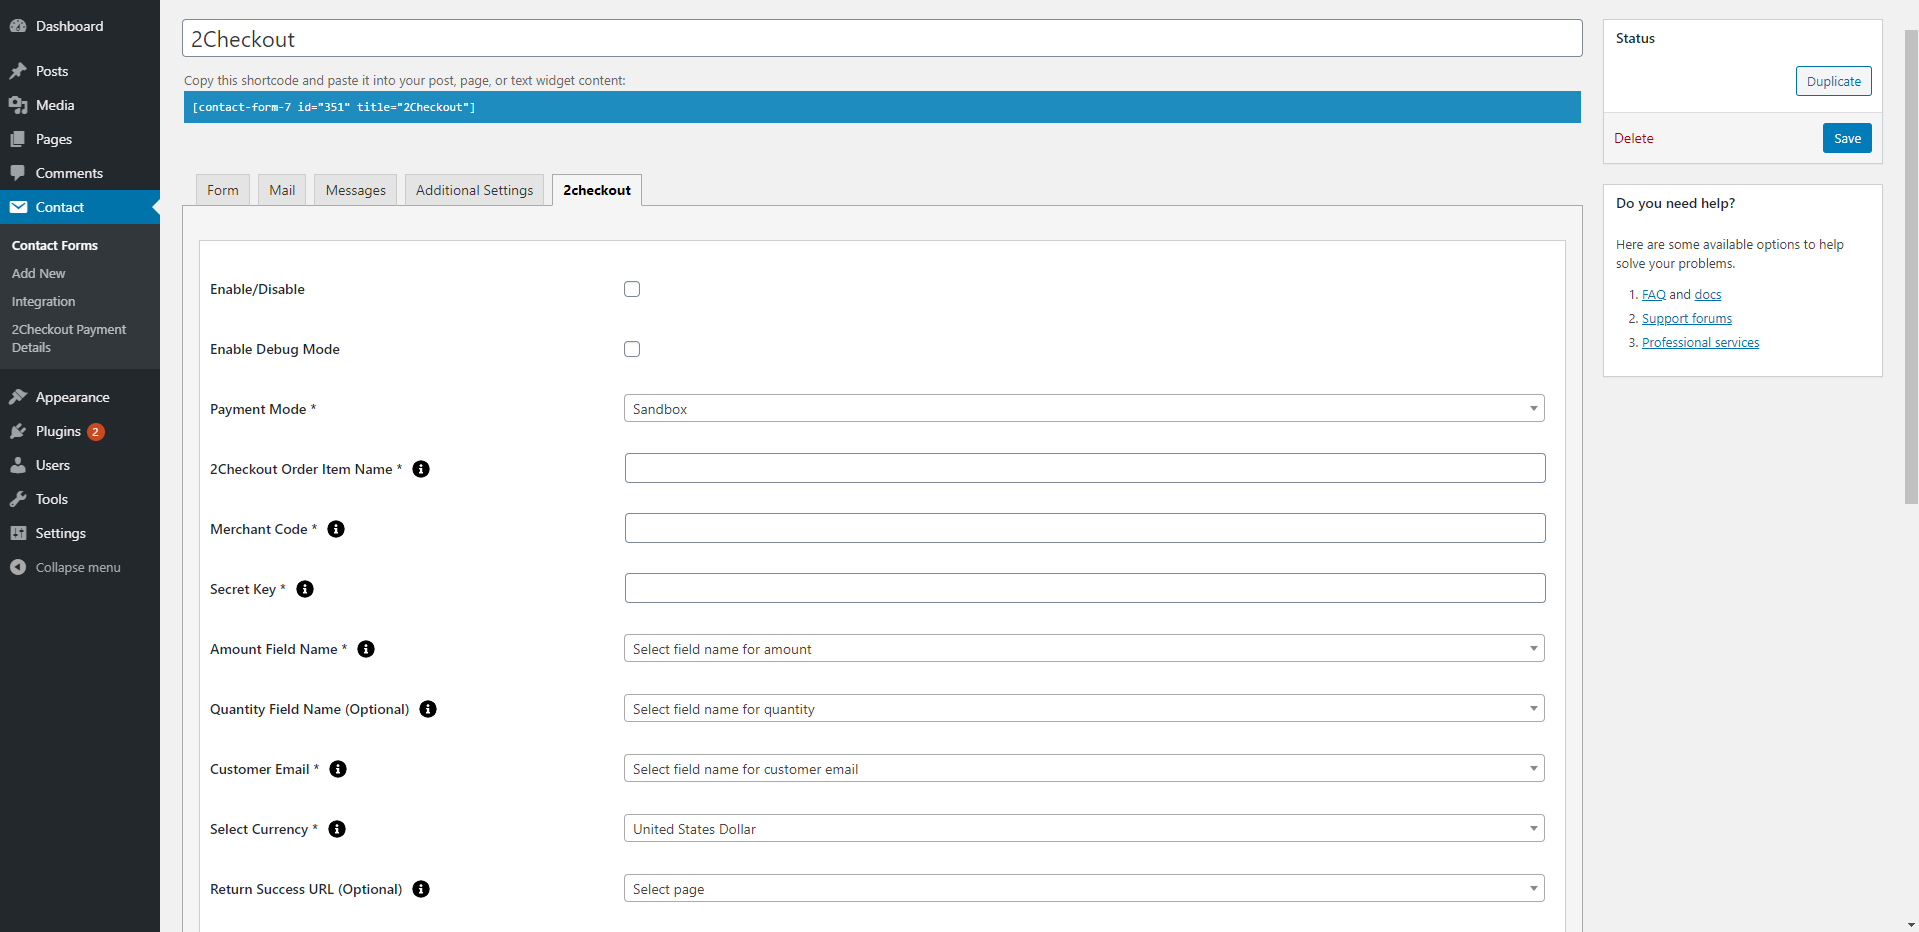
- Enable / Disable - Check the 2checkout Payment Form option for 2checkout submit button activation.
- Enable Debug Mode - Check the Enable Debug Mode to start transaction debugging.
- Payment Mode
This option will allow you to set the Sandbox 2checkout payment process in test mode. - Merchant Code (required)- This field is required when you want to take payment using 2checkout.
Secret Key (required) - This field is required when you want to take payment using 2checkout. - Amount Field Name (required) - You have to select a name attribute for the amount field of Contact Form 7 like dropdown menu, textbox, hidden field, radio buttons, etc.
- Quantity Field Name (optional) - You have to select a name attribute for the quantity field of Contact Form 7 like dropdown menu, textbox, hidden field, radio buttons, etc.
- Customer Email (required) - You have to set a name attribute for the text field of contact form 7, from which you need to pass the custom email of the customer to the 2Checkout website.
- Select Currency (required) - You can select your currency of 2Checkout here. The default is set as USD(United States Dollar).
- Success Return URL (optional) - You can enter the URL of the page to redirect for a Successful 2Checkout Payment transaction.
- Cancel Return URL (optional) - You can enter the URL of the page to redirect if a transaction fails.
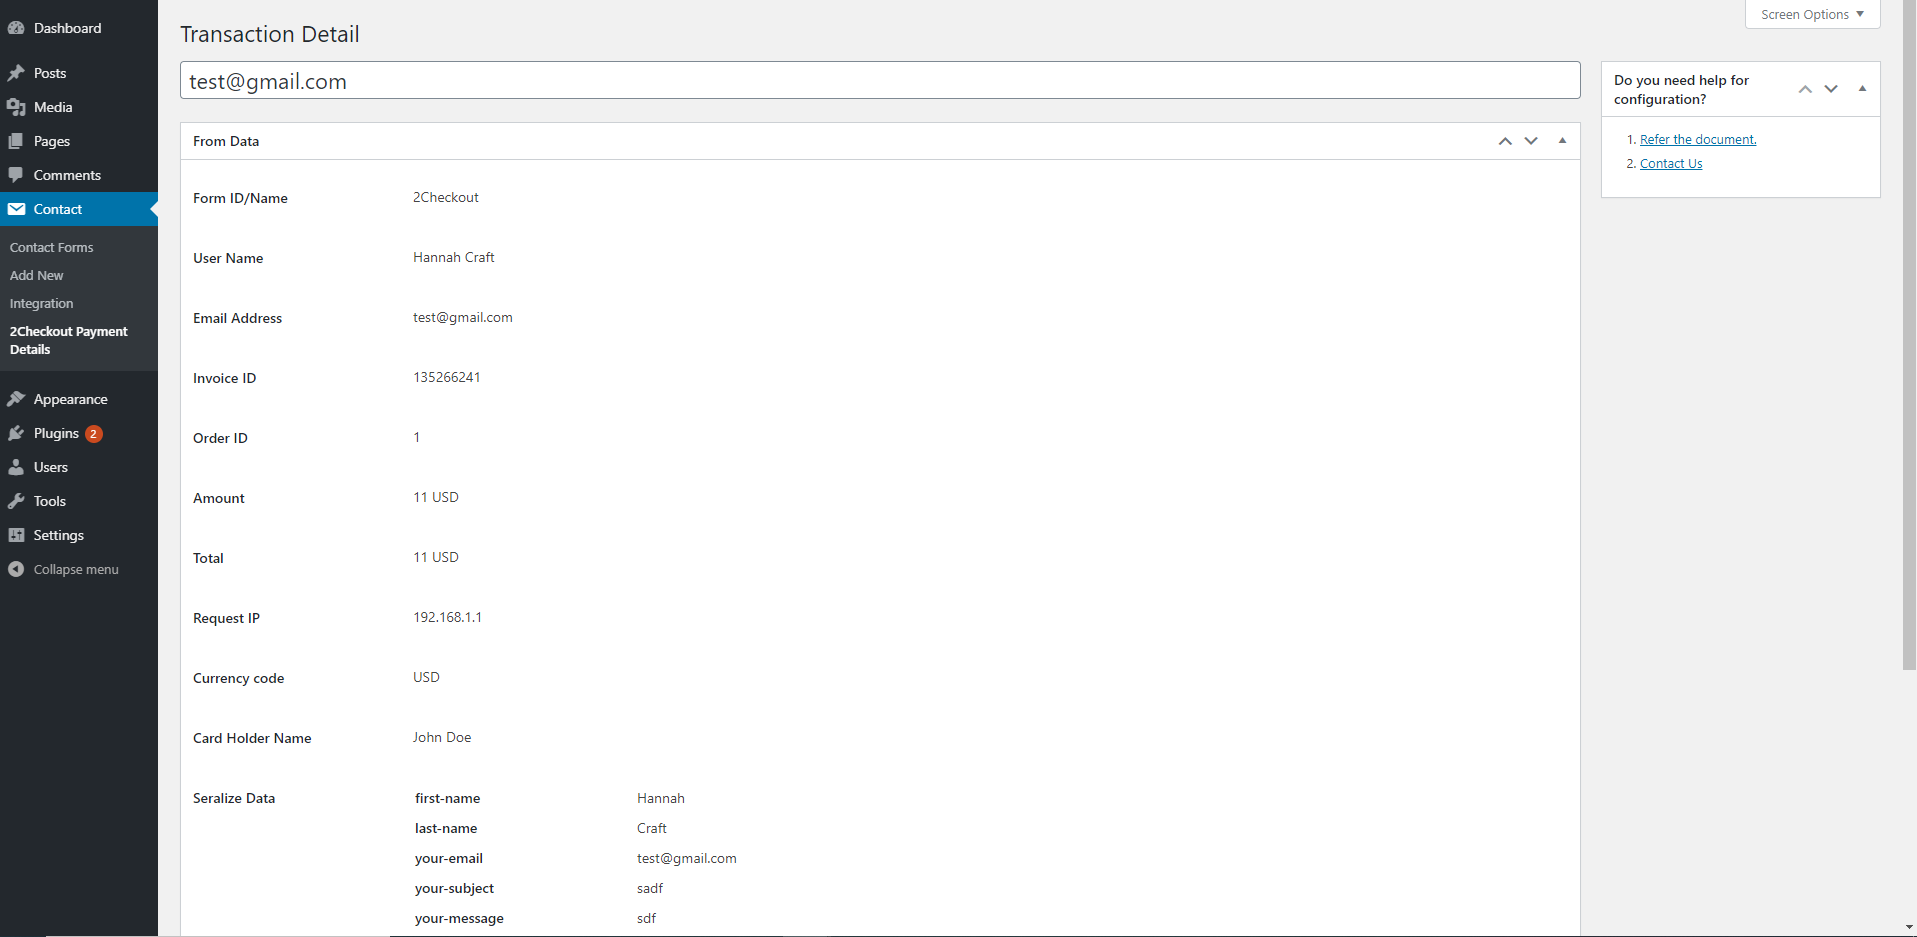
For 2Checkout Payment Details
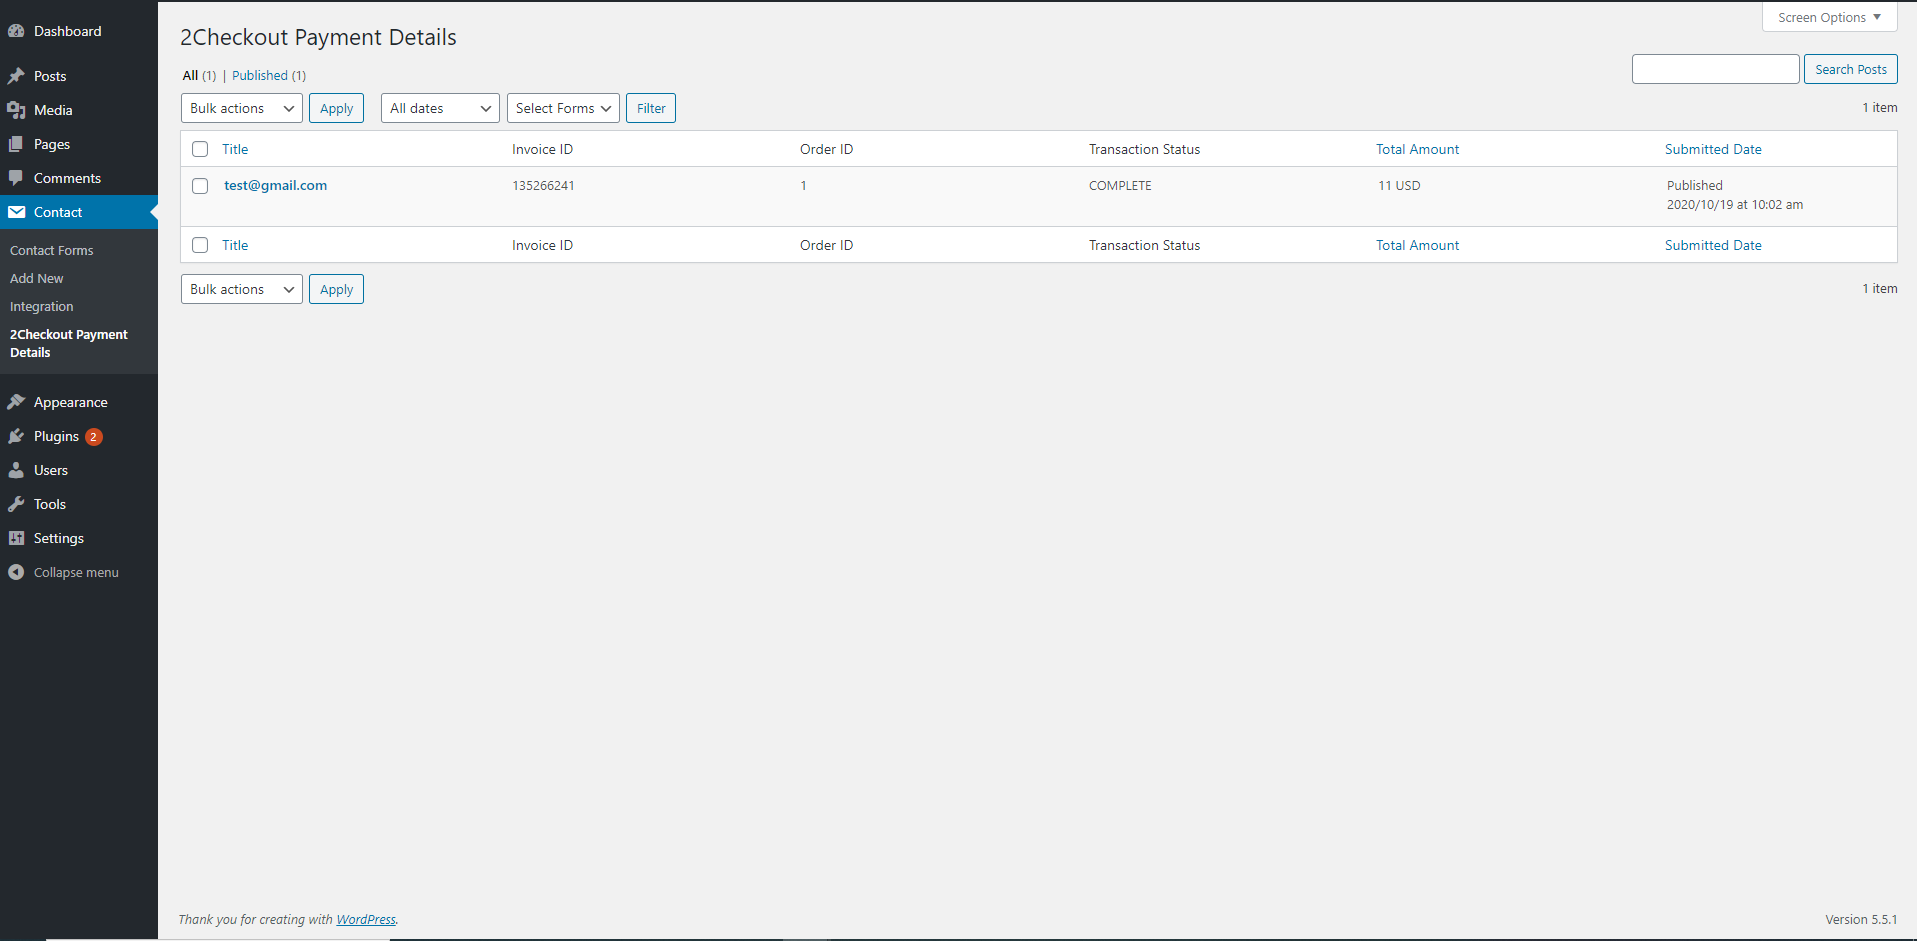
Title - User Email The payer's email address.
Total Amount - The total amount charged for the transaction.
Submitted Date - The date and time when the payment was made.
Transaction Status - The current state of the payment:
- Approved: Payment successful.
- Pending: Processing.
- Declined: Payment failed.
- Refunded: Payment returned.
Get Support
FAQs
How to display 2 checkout payment information after successful payment?
To display 2 checkout payment information after successful payment, you need to add the "[two-checkout-details]" tag on the ‘Success URL’ page.
How to add 2 checkout payment information in the email body?
It would be best to use the same tag you use to display the 2 checkout payment form; you can find that tag in the mail body tag list.
How to display the 2 checkout payment form option in contact form 7?
You need to add the 2 Checkout tag, which you will find in the form tag with the name 2 Checkout.
Change log
version 1.1
- Compatibility with new cf7 version
- Fix minor bugs and improve functionality
version 1.0
- Initial Release