Accept Sagepay(Opayo) Payments Using Contact Form 7 Pro
Overview
Description
‘Accept Sagepay(Opayo) Payments Using Contact Form 7 Pro’ plugin facilitates seamless integration of secure payment processing directly through Contact Form 7. This innovative solution ensures the authorization of credit and debit card transactions with ease and confidence, all managed through a straightforward user interface on your website.
Plugin's purpose and benefits
- Currency Support - Handles payments in 25 currencies.
- Transaction Management - In 2Checkout Pro version, view all payment transactions in the admin panel.
- Input Field Handling - Retrieves values from all input fields including dropdown menus, textboxes, hidden fields, and radio buttons.
- Search and Filter - Provides filters and search functionalities in the admin interface.
- Dynamic Value Acceptance - Accepts dynamic values from the frontend, such as item description, amount, email, and quantity.
- Testing Mode - Option to enable Sagepay (Opayo) Sandbox Mode for payment testing.
- Data Storage - Stores Contact Form 7 payment data in the database.
- Payment Details Viewing - Admin can view Sagepay (Opayo) payment details.
- Email Tag - Use the [Sagepay-payment-details] tag to display payment responses in emails.
- Post-Transaction Emails - Sends individual emails to customers and admins after Sagepay (Opayo) transactions.
- CSV Export - Option to export Contact Form 7 payment data to CSV.
- Redirect URLs - Set 'Success Return URL' and 'Cancel Return URL' pages for redirection after payment.
- Country Field Tag - Use the Country field Tag option to display the country in the drop-down list; for custom approaches, set drop-down values in ISO 3166 (e.g., GB, IE, DE).so we prefer to use our tag to display the country list.
- WordPress VIP Compatibility - Fully compatible with WordPress VIP.
- Multiple Payment Forms -Allows creation of multiple payment forms using Contact Form 7.
Get Started
Quick setup instructions


How To Use & Features

You have to configure it from wp-admin > Contact > Add/Edit Contact Forms (Contact Form 7 needs to be activated before) to use this plugin. You will find a new tab, “Sagepay,” along with Form, Mail, Messages, Additional Settings from where you can make all settings related to the Sagepay plugin.
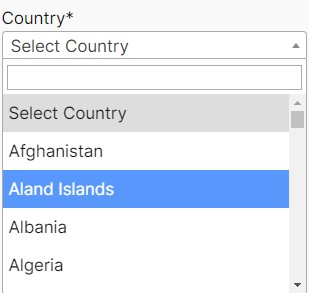
You can use the Country field Tag option to display the country in the drop-down if you are going with custom u need to set the drop-down value in ISO 3166 ( Examples: GB, IE, and DE ), so we prefer to use our tag to display the country list.
For wp-admin >Sagepay(Opayo) payment form to your Contact Form 7

- Sagepay(Opayo) Enable - Check the Sagepay Payment Form option for Sagepay submit button activation.
- Enable Debug Mode - Check the Enable Debug Mode to start transaction debugging
- Enable Payment Mode - This option will allow you to set the Sandbox Sagepay payment process in test mode.
- Sandbox Vendor Name (required) - This field is required when you have set Sagepay mode to sandbox if your site is in test mode.
Get Your Sandbox Vendor Name: Click here. {Link inviliude} - Sandbox Encryption Password (required) - This field is required when you have set Sagepay mode to sandbox if your site is in test mode.
Get Your Encryption Password Key: Click here. {Link inviliude} - Live Vendor Name (required) - This field is required to set Sagepay mode to live if your site is in live mode.
- Get Your Live Vendor Name - This field is required when you have set Sagepay mode to live if your site is in live mode.
Get Your Live Encryption Password: - Amount Field Name (required) - You have to select a name attribute for the amount field of Contact Form 7 like dropdown menu, textbox, hidden field, radio buttons, etc.
- Quantity Field Name (optional) - You have to select a name attribute for the quantity field of Contact Form 7 like dropdown menu, textbox, hidden field, radio buttons, etc.
- Customer Email Field Name (required) - You have to set a name attribute for the text field of contact form 7, from which you need to pass the customer’s custom email to the Sagepay website.
- Transaction type (required ) - Sage Pay offers you a wide variety of transaction types that you can process. Each of the types differs in the way they process transactions.
- Apply 3D Secure (required) -The 3D Secure authentication is an additional fraud prevention scheme that is available to all companies using the Sage Pay system to process transactions.
- Select Currency (required) - You can select your currency of Sagepay here. The default is set as GBP(Pound Sterling).
- VendorTXCode Prefix (optional) - Please enter the unique prefix name, which displays in the invoice order.
- Success Return URL (optional) - You can enter the URL of the page to redirect for a Successful Sagepay Payment transaction.
- Cancel Return URL (optional) - You can enter the URL of the page to redirect if a transaction fails.

- Customer Billing & Shipping Details
- First Name (required) - You have to select a name attribute for the first name field of contact form 7.
- Last Name (required) - You have to select a name attribute for the last name field of contact form 7.
- Address (required) - You have to select a tag name for the address field of contact form 7.
- City (required) - You have to select a tag name for the city name field of contact form 7.
- State (required) - You have to select a tag name for the state name field of contact form 7.
- Zip Code (required) - You have to select a tag name for the zip code field of contact form 7.
- Country (required) - You have to select a tag name for the country field of contact form 7.
Plugin with separate Menu as “Sagepay(Opayo) Payments CF7 Pro”
For Dashboard

- Total Transaction- Displays the total number of transactions processed.
- Total Amount- Displays the total amount of transactions processed.
- Success Transaction- Displays the number of transactions that were successfully processed.
- Failed Transaction- Displays the number of transactions that failed to process.
- Total Monthly Transactions- Displays transactions chart-wise on a monthly basis
- Total Yearly Transactions- Displays transactions in a pie chart format on a yearly basis.

- View Your Recent Transactions- Displays the 5 most recent transactions.
- Filter- Displays transactions based on selected date, form, and status (Approved, Canceled, Refunded).
For Transaction

- Title - User Email The payer's email address.
- Total Amount - The total amount charged for the transaction.
- Submitted Date - The date and time when the payment was made.
- Transaction Status - The current state of the payment:
- Approved: Payment successful.
- Pending: Processing.
- Declined: Payment failed.
- Refunded: Payment returned.
- Invoice ID - The unique identifier for the order provided by Sagepay.
- Order ID - The unique identifier for the order provided by Sagepay
For Sagepay(Opayo) Form Details

Form Data:
- First-name, last-name - The first and last names of the user.
- Your-email - Email address of the user.
- Amount - The transaction amount.
- Qty - Quantity of items bought.
- city, state, address, zipCode - The billing or shipping address details.
- Opayo_country-632 - The country code related to the transaction.
- g-recaptcha-response, recaptcha - Security fields used to verify the user is not a robot.
Transaction Status:
- First-name, last-name - The first and last names of the user.
- Your-email - Email address of the user.
- Amount - The transaction amount.
- Qty - Quantity of items bought.
- city, state, address, zipCode - The billing or shipping address details.
- Opayo_country-632 - The country code related to the transaction.
- g-recaptcha-response, recaptcha - Security fields used to verify the user is not a robot.
For Sagepay(Opayo) Add-on Subscription

- If you activate the subscription purchase plugin, you'll receive an email with your subscription key.
For Email Template

For Settings
Dashboard Widgets

- Dashboard Widgets- Enable or Disable the Widget on the Dashboard.
Import / Export

- Import CSV- This feature allows you to bring in all Sagepay(Opayo) transaction data and form data into your system.
- Export CSV- This feature enables you to extract and save all Sagepay(Opayo) transaction data and form data from your system.
Log File

- Enable Debug Logging- Check this option to enable debug logging. View log | Clear log Error log cleared
- Error log duration- Select option to clear the log based on weekly, monthly or never.
Help and Support

- Access helpful resources including documentation, FAQs, and support options in one place.
- Easily submit support tickets or explore guides to resolve issues quickly.
- Stay updated with the latest insights through blogs and newsletter subscriptions.
Get Support
FAQs
How can I display Sagepay (Opayo) payment information on my webpage after a successful payment?
To display Sagepay (Opayo) payment information on your webpage after a successful payment, simply add the
[Sagepay-details]tag to the desired location on the page. This tag will dynamically insert the relevant payment information for your users.
How can I include Sagepay (Opayo) payment information in an email?
To include Sagepay (Opayo) payment information in an email, you need to add the
[Sagepay-payment-details]tag within the email body. This tag ensures that the payment details are automatically embedded in the email sent to the customer after a successful transaction.
Change log
version 2.0.2
- Access helpful resources including documentation, FAQs, and support options in one place.
- Easily submit support tickets or explore guides to resolve issues quickly.
- Stay updated with the latest insights through blogs and newsletter subscriptions.
version 2.0.1
- Webhook Customization – Send payment and form data to external systems using customizable webhooks for seamless workflow automation.
- Test Webhook Request – Instantly test webhook endpoints to verify data delivery and processing before going live.
- Automated Tax Calculation – Automatically calculate applicable taxes during Sagepay (Opayo) payments for accurate and compliant transactions.
version 2.0.0
- Dashboard Enhancements.
- Added smart filtering (Day, Month, Year, Custom Range) with Clear Filter option.
- Introduced Monthly Distribution Pie Chart for transaction insights.
- Added Recent Transactions section with quick access to payment details.
- Dashboard Widgets
- Admin toggle to enable/disable widgets.
- New Sagepay (Opayo) Insights Widget showing key metrics (Total Revenue, Transactions, Success/Fail Count).
- CSV Management
- Export all Sagepay (Opayo) transactions to CSV.
- Import payment records via CSV.
- Log Management
- Eable/disable debug logging from settings.
- Customizable Email Templates
- Design personalized email templates for admin and user notifications.
version 1.8
- API issue fixed.
version 1.7
- The updated URLs are.
- https://sandbox.opayo.eu.elavon.com/gateway/service/vspform-register.vsp
- https://live.opayo.eu.elavon.com/gateway/service/vspform-register.vsp
version 1.6
- Improved compatibility with WordPress VIP platform by refactoring code to adhere to VIP coding standards.
version 1.5
- Fix minor bugs and improve functionality
version 1.2
- Fix minor bugs and improve functionality
version 1.1
- Compatibility with new cf7 version
- Fix minor bugs and improve functionality
version 1.0
- Initial Release