Accept Authorize.NET Payments Using Contact Form 7
Overview
Description
The "Authorize.NET Payments Using Contact Form 7" plugin allows you to accept secure payments directly on your website through the Authorize.NET payment gateway. It's designed to work with the Contact Form 7 plugin, making it easy to receive credit card payments without redirecting users to a third-party site. This plugin supports one-time payments and is backed by fraud prevention tools. ZealousWeb Technologies provides support for integration within 30 days of purchase.
Plugin's purpose and benefits
- Multi-Currency Support - Accept payments in 25 different currencies.
- Multiple Payment Forms - Create several payment forms using Contact Form 7.
- Multiple Forms on One Page - Place multiple payment forms on a single post or page.
- Input Field Flexibility - Capture values from various input fields, including drop-down menus, textboxes, hidden fields, and radio buttons.
- Dynamic Value Processing - Accept dynamic values from front-end parameters like item descriptions, amounts, emails, quantities, and customer details.
- Test API Mode - Enable a test mode to ensure the payment process works correctly before going live.
- Free Version Limitation - View up to 10 payment transactions in the admin panel with the free version of Authorize.NET.
- Admin-Side Payment Data - View payment details on the admin side.
- Export to CSV: Export payment data from Contact Form 7 to a CSV file.
- Admin Search and Filter - Use search and filter options on the admin side for easier data management.
- Manage Payment Data - Admins can view and delete payment data.
- Email Notifications - Send individual emails to customers and admins after a payment transaction.
- Customizable Emails - Personalize the content of the emails sent after transactions.
- Return URL Pages - Add ‘Success Return URL’ and ‘Cancel Return URL’ pages to redirect users after a payment transaction.
- Transaction Details Shortcode - Use the shortcode [authorize-details] to display transaction details like ID, amount, currency, and status.
- WordPress VIP Compatibility - The plugin is compatible with WordPress VIP.
Get Started
Quick setup instructions
How To Use & Features
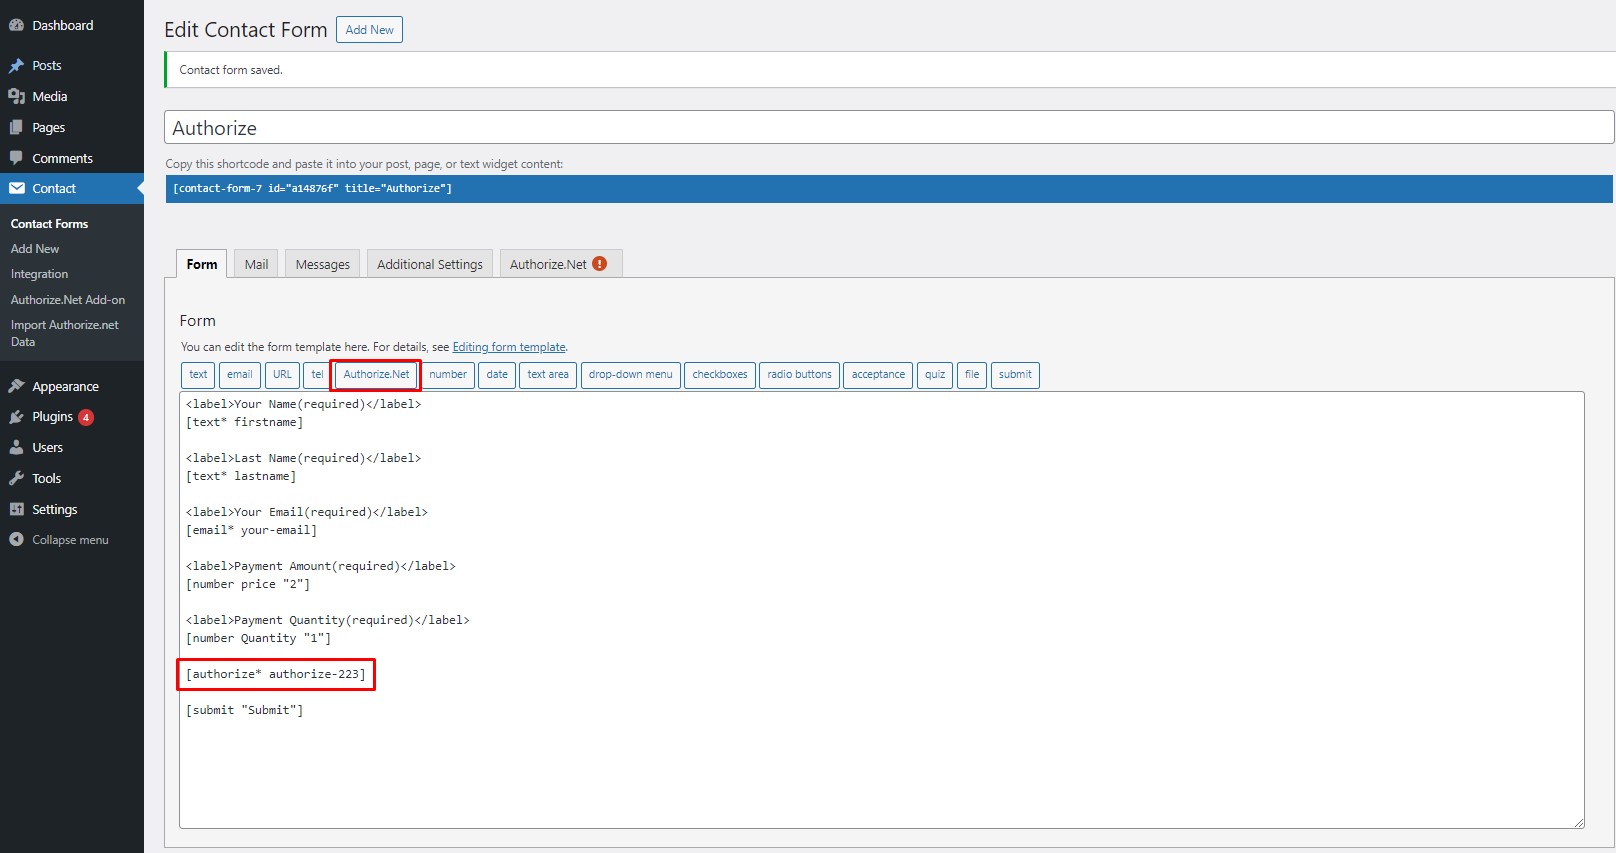
You have to configure it from wp-admin > Contact > Add/Edit Contact Forms (Contact Form 7 needs to be activated before) to use this plugin.
You will find a new tab “Authorize.Net“ along with Form. Mail. Messages. Additional Settings from where you can make all settings related to Authorize.Net.
Remember to include the "Authorize.Net" tag within your form where you want the payment form to appear. This tag can be found alongside other standard tags like text, email, and URL.
This setup enables you to seamlessly integrate Authorize.Net payment forms into your Contact Form 7 setup on WordPress.
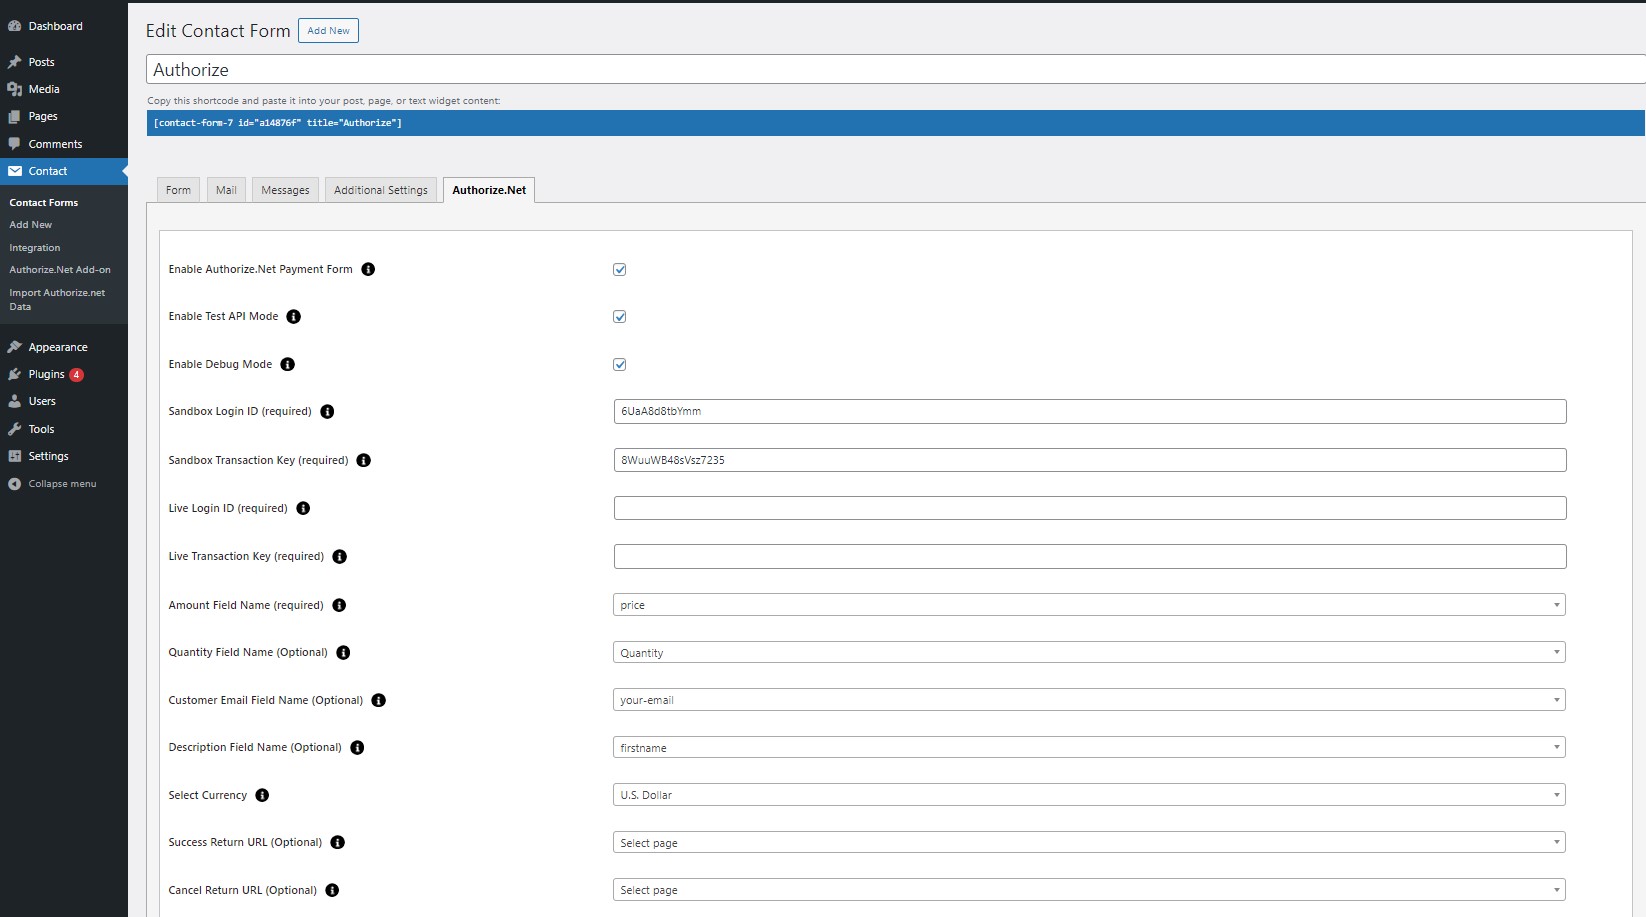
For wp-admin > Contact > Contact Forms > Authorize.Net
- Enable Authorize.Net Payment Form - Check this option to activate the Authorize.Net submit button.
- Enable Test API Mode - Check this option to use the test API mode for transactions.
- Enable Debug Mode - Check this option to start transaction debugging.
- Sandbox Login ID (required) - Needed when using sandbox mode for testing. Get it from your Authorize.net account under Account > Security Settings > API Credentials & Keys.
- Sandbox Transaction Key (required) - Needed when using sandbox mode for testing. Generate it in your Authorize.net account under Account > Security Settings > API Credentials & Keys.
- Live Login ID (required) - Needed when using live mode for real transactions. Get it from your Authorize.net account under Account > Security Settings > API Credentials & Keys.
- Live Transaction Key (required) - Needed when using live mode for real transactions. Generate it in your Authorize.net account under Account > Security Settings > API Credentials & Keys.
- Amount Field Name (required) - Set a name attribute in your Contact Form 7 field to pass the amount value to Authorize.net. Example: [number amount "20"] (set "amount" in this field).
- Quantity Field Name (optional) - Set a name attribute in your Contact Form 7 field to pass the quantity to Authorize.net. Example: [number Quantity "1"] (set "quantity" in this field).
- Customer Email Field Name (optional) - Set a name attribute in your Contact Form 7 text field to pass the customer's email to Authorize.net.
- Description Field Name (optional) - Set a name attribute in your Contact Form 7 text field to pass the description to Authorize.net.
- Select Currency - Choose your currency. Default is AUD (Australian Dollar).
- Success Return URL (optional) - Enter the URL to redirect to after a successful transaction.
- Cancel Return URL (optional) - Enter the URL to redirect to if the transaction fails.
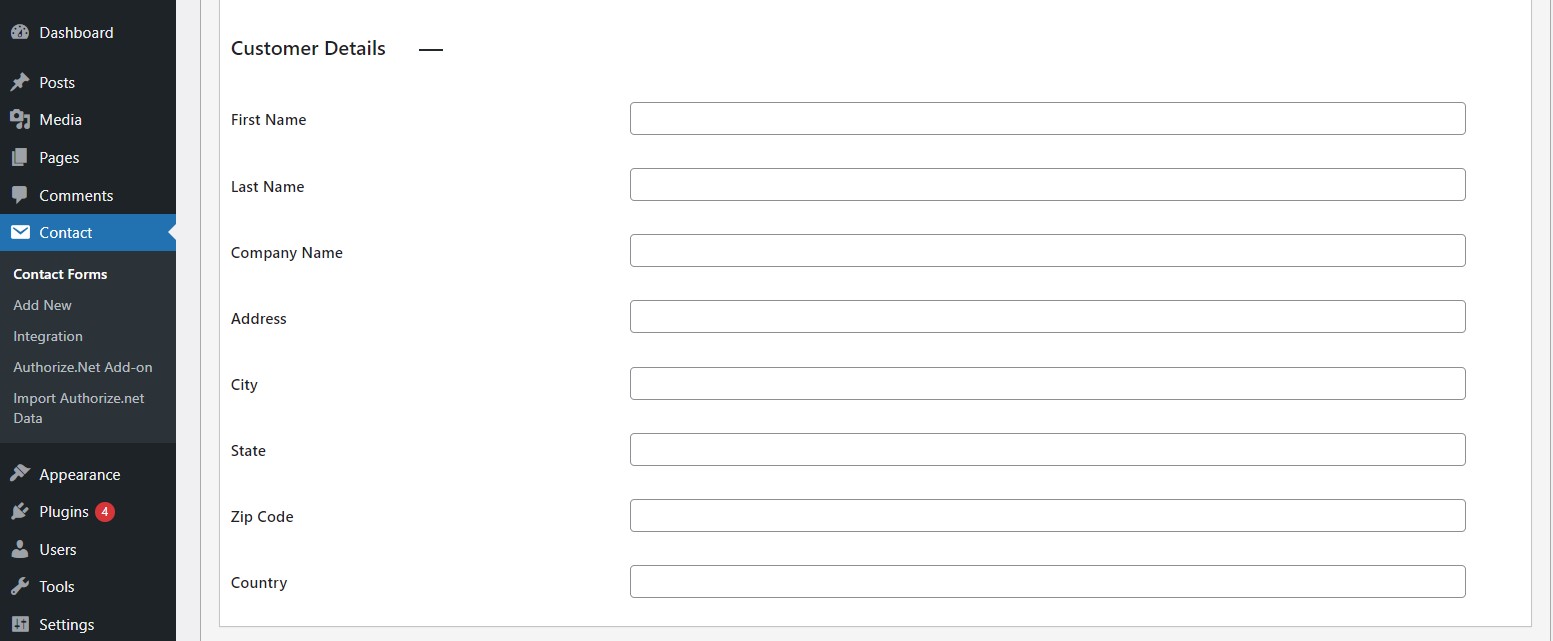
- Customer Details - Set name attributes in your Contact Form 7 text fields to pass customer details to Authorize.net:
- First Name
- Last Name
- Company Name
- Address
- City
- State
- Zip Code
- Country
For Authorize.Net Form Details
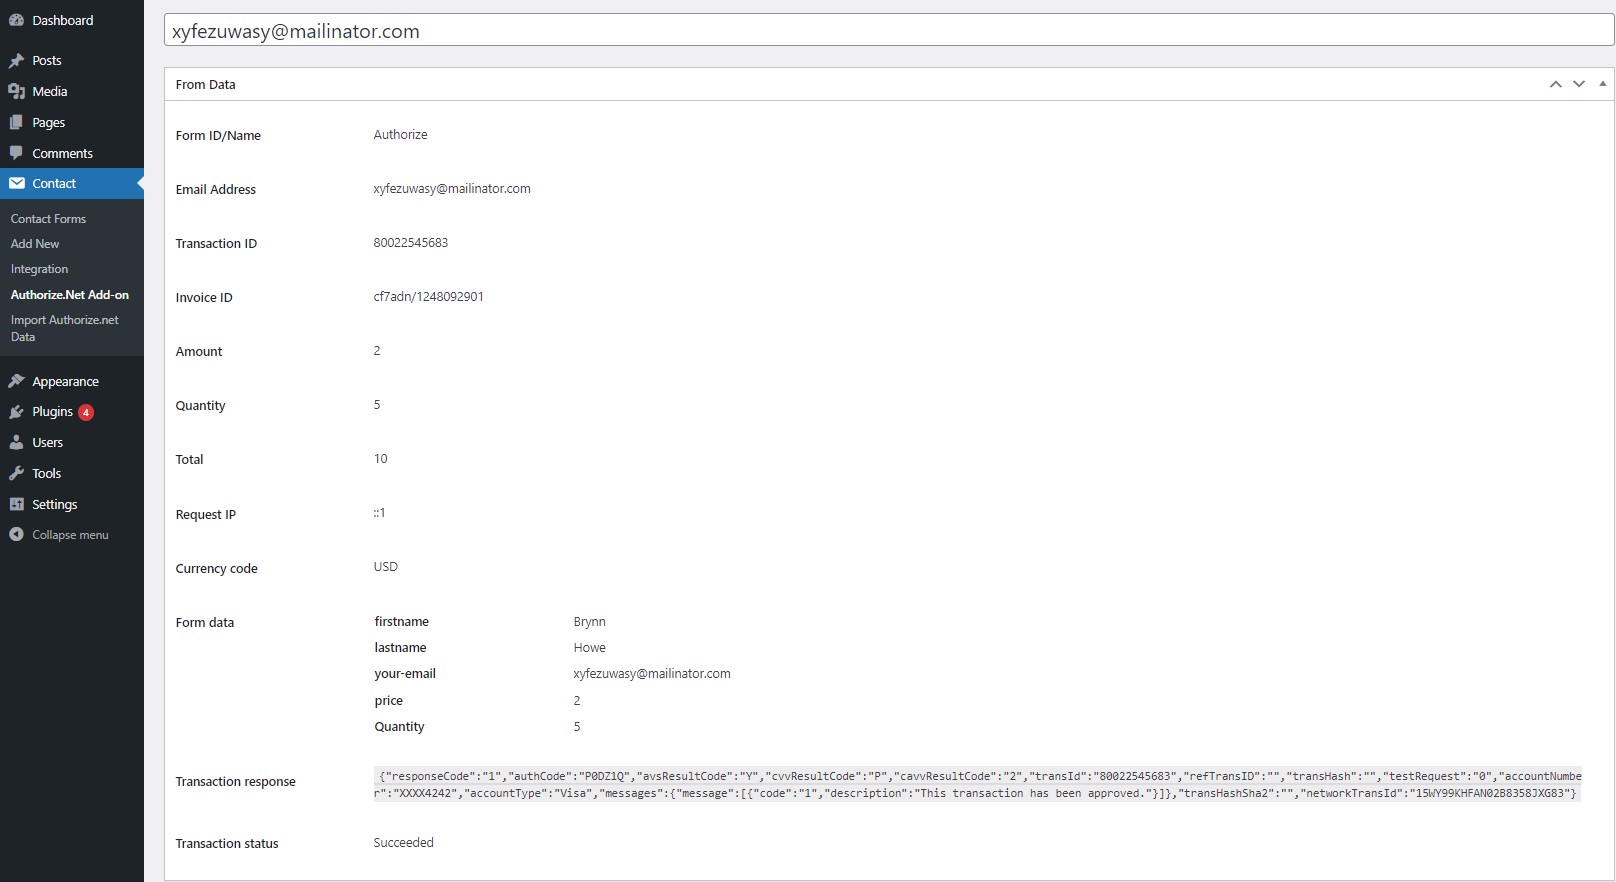
To manage transaction listings in Accept Authorize.NET Payments Using Contact Form 7 you can include the following features:
- Form ID/Name - The unique identifier or name of the Contact Form 7 form used for the transaction.
- Email Address - The payer's email address used during the transaction.
- Transaction ID - A unique identifier for the specific payment transaction generated by Authorize.NET.
- Invoice ID - The unique invoice number associated with the transaction for tracking and reference.
- Amount - The total amount charged for the transaction.
- Quantity - The number of items or services purchased in the transaction.
- Total - The overall total amount charged, including any taxes or fees.
- Request IP - The IP address from which the payment request was made.
- Currency Code - The currency in which the payment was processed (e.g., USD, EUR).
- Form Data - The collected data from the Contact Form 7 form fields, including:
- First Name - The first name of the payer.
- Last Name - The last name of the payer.
- Your Email - The payer's email address as entered in the form.
- Price - The price of the item or service being purchased.
- Quantity: The number of items or services purchased.
- Transaction Response - The detailed response from Authorize.NET regarding the payment transaction.
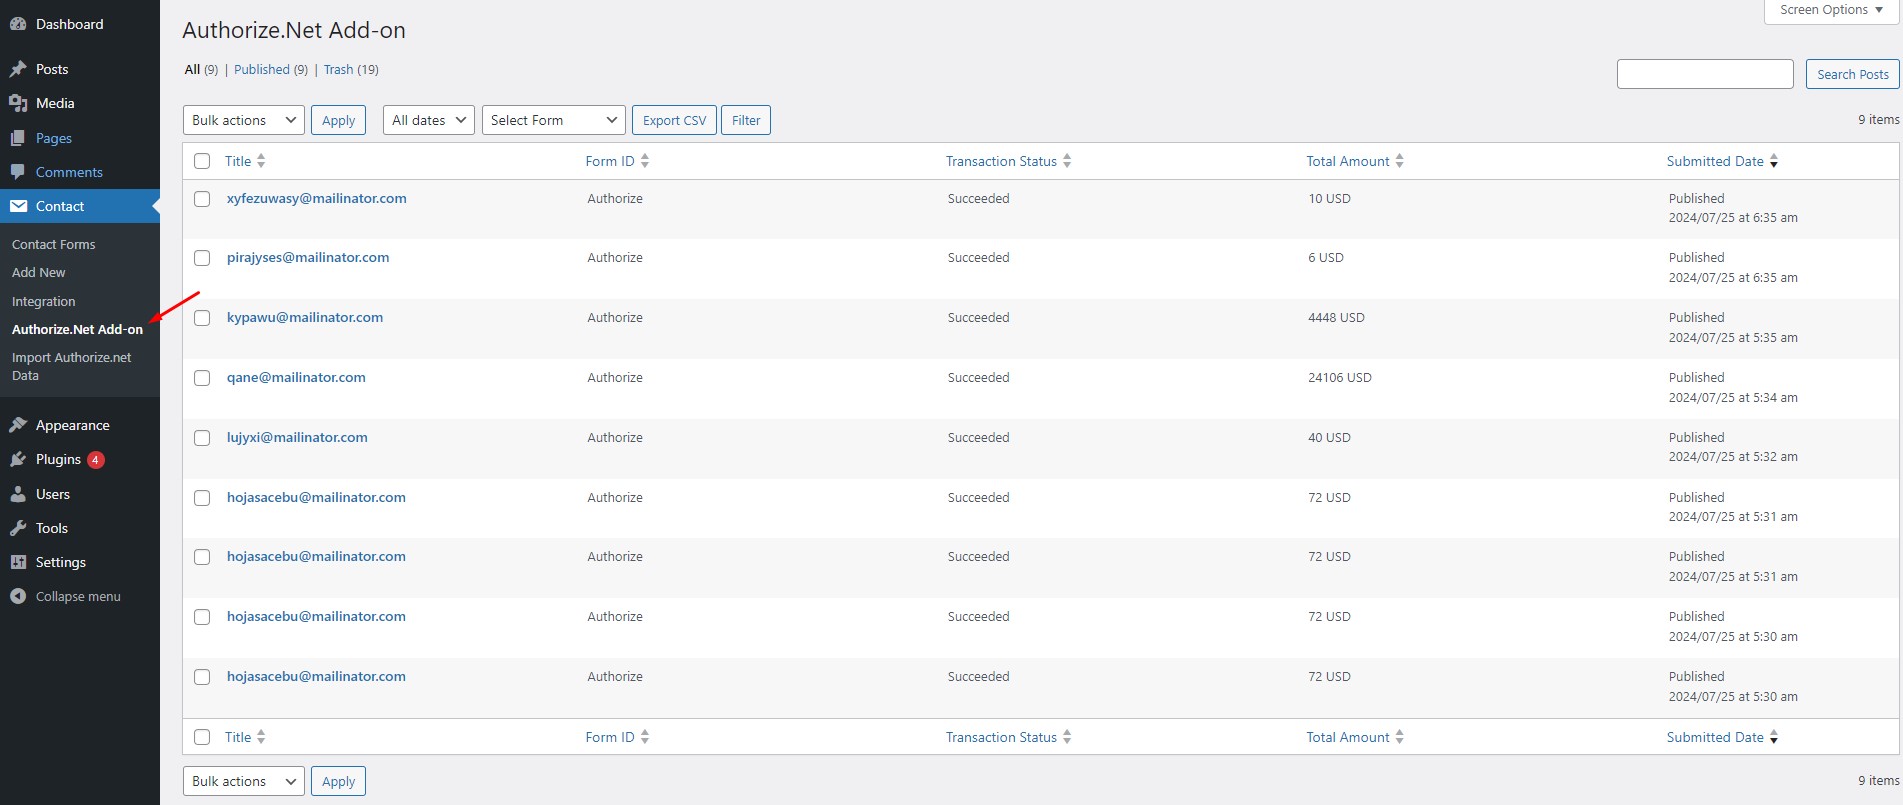
For Authorize.Net Payment Transaction Details
- Title - The payer's email address.
- Form ID - Identifier for the specific payment form used.
- Total Amount - The full amount charged for the transaction.
- Submitted Date - The date and time when the payment was made.
- Transaction Status - The current state of the payment:
- Approved - Payment successful.
- Pending - Payment is still processing.
- Declined - Payment failed.
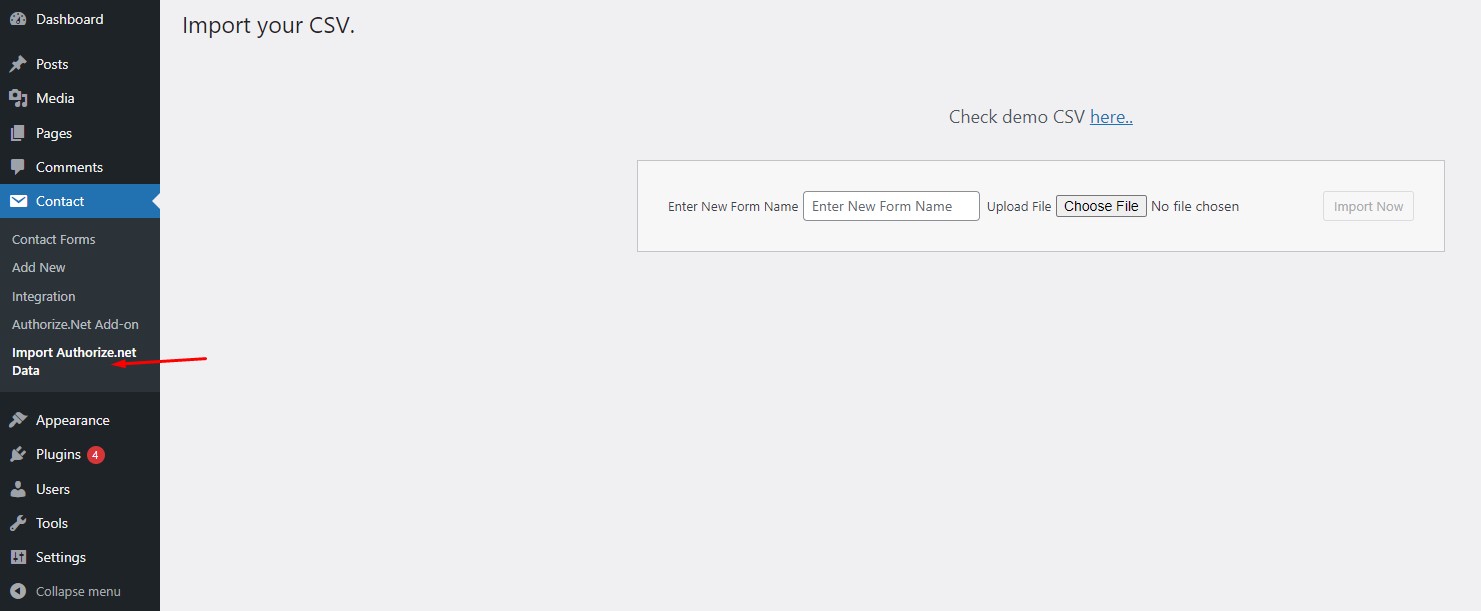
For Import Authorize.net data
- Enter New Form Name - Name the form you're creating for the data import.
- Choose File - Pick the file with the Authorize.net data you want to import.
- Import Now - Click this button to begin importing the data from the selected file
Get Support
FAQs
How does the Currency option work?
You need to select currency as per your Authorize.Net account.
What credentials are required for Authorize.Net configuration?
You need to add Login ID and Transaction ID in contact form 7's Authorize.Net tab.
Is the plugin provide recurring payment?
No, it does not provide the recurring payment.
Change log
version 1.3
- Minor Bug Fix
version 1.1
- Compatibility with new cf7 version
version 1.0
- Initial Release


