Smart Appointment & Booking
Overview
Description
ZealousWeb Technologies has come up with a powerful solution - Smart Appointment & Booking. This all-in-one plugin efficiently manages appointments with customizable forms, seamless booking. It enhances customer experiences and streamlines processes for service-based businesses, appointment management, and booking services.
Plugin's purpose and benefits
- Create and Configure Forms - Design and customize booking forms tailored to your needs, including setting up thank-you messages and page redirections.
- Booking Calendar Settings - Configure your booking calendar and customize settings for successful bookings.
- Manage Bookings - Easily track, modify, and cancel bookings from the admin panel. View and edit booking entries, update statuses, and send manual notifications.
- Physical and Virtual Appointments - Offer both physical and virtual appointments. Share Google or Zoom links via email for virtual interactions.
- Waitlist Feature - Allow customers to join a waitlist for full bookings, with options to approve bookings and send notifications.
- Guest Check-In - Enable anyone to submit forms without requiring account creation.
- Staff Management - Allow staff to efficiently reschedule or cancel bookings as needed.
Get Started
Quick setup instructions


How To Use & Features
Clicking on the menu item labeled “WP Smart A & B” should display it as a separate menu item in the admin panel.
For WP Smart A & B
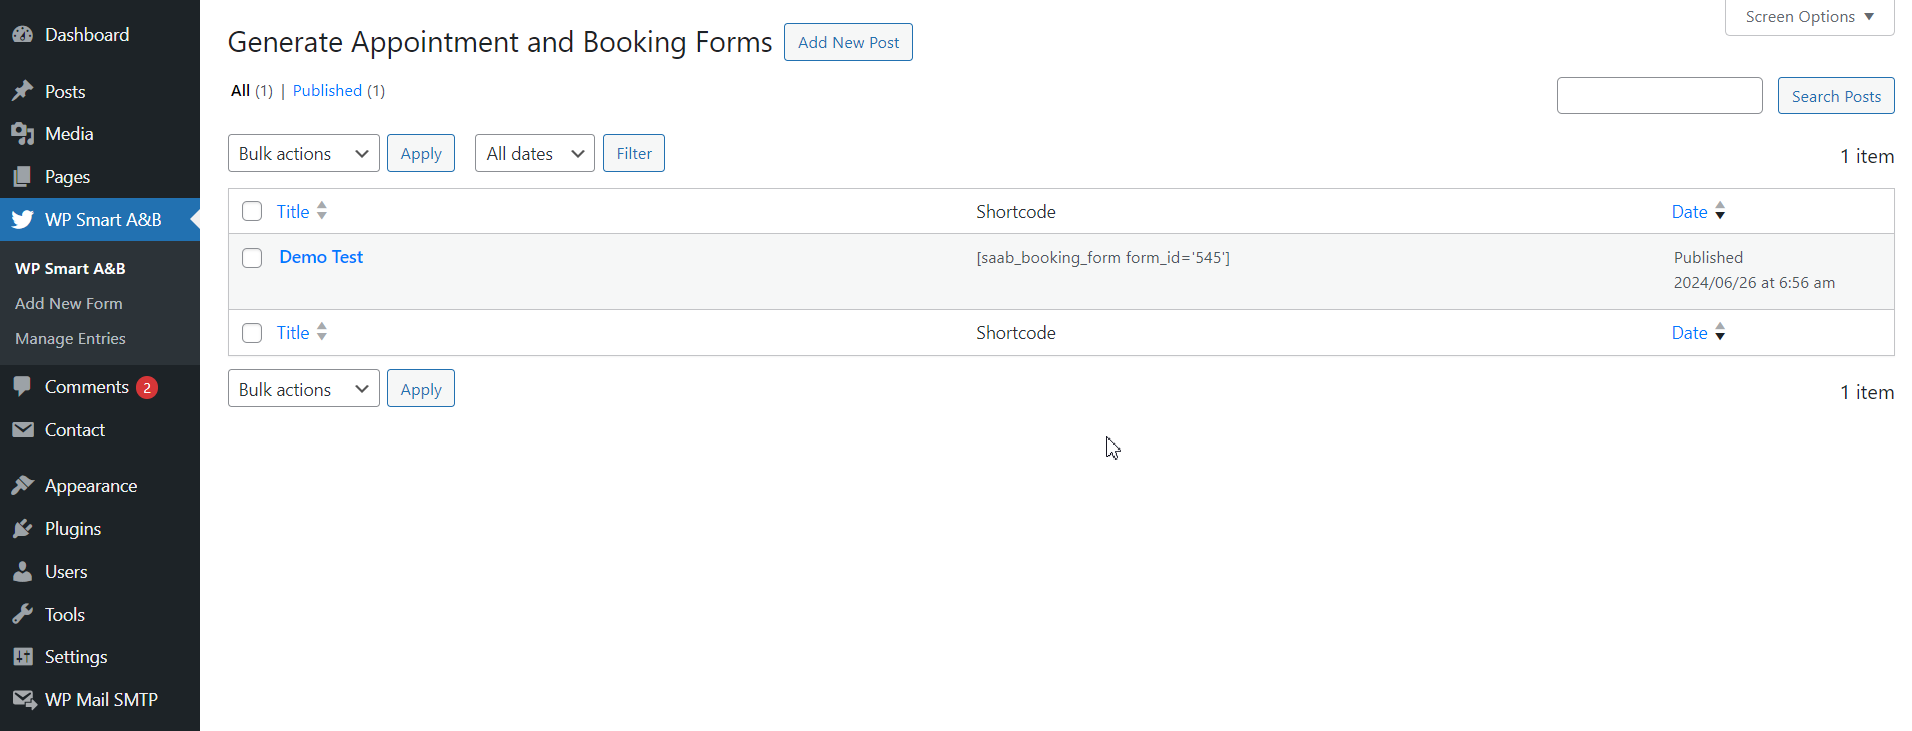
- Form Name: The name of the appointment form.
- Shortcode: The shortcode used to embed or display the form.
- Date: The date when the form was created or last modified.
For Add New Form
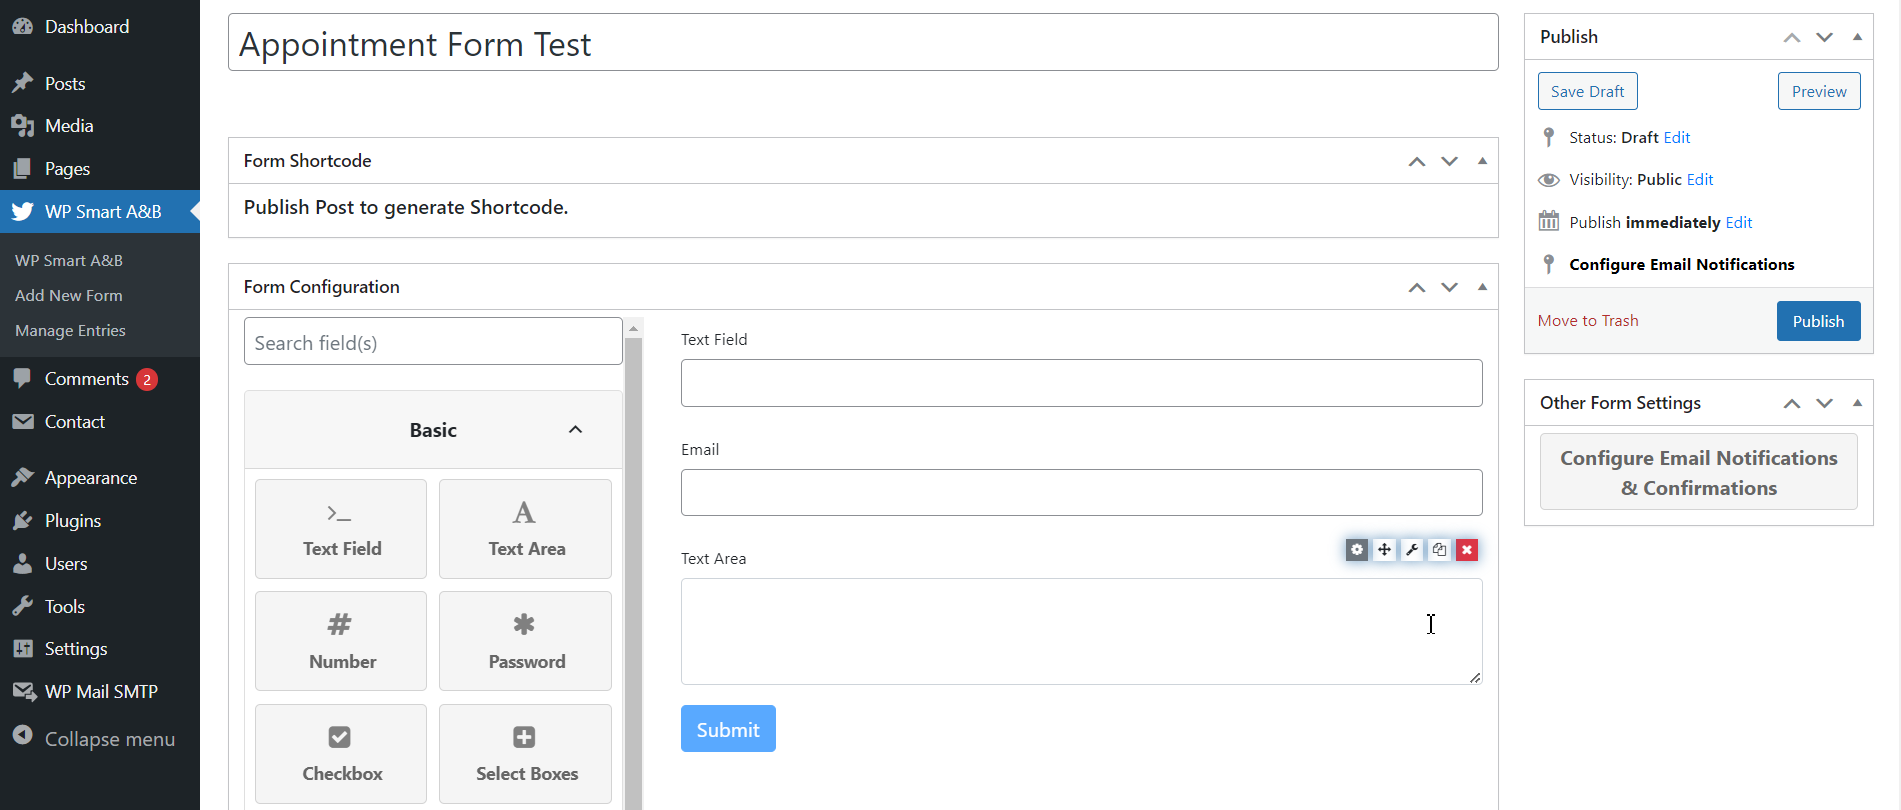
The form configuration includes four main types of fields:
Form Configuration
Basic
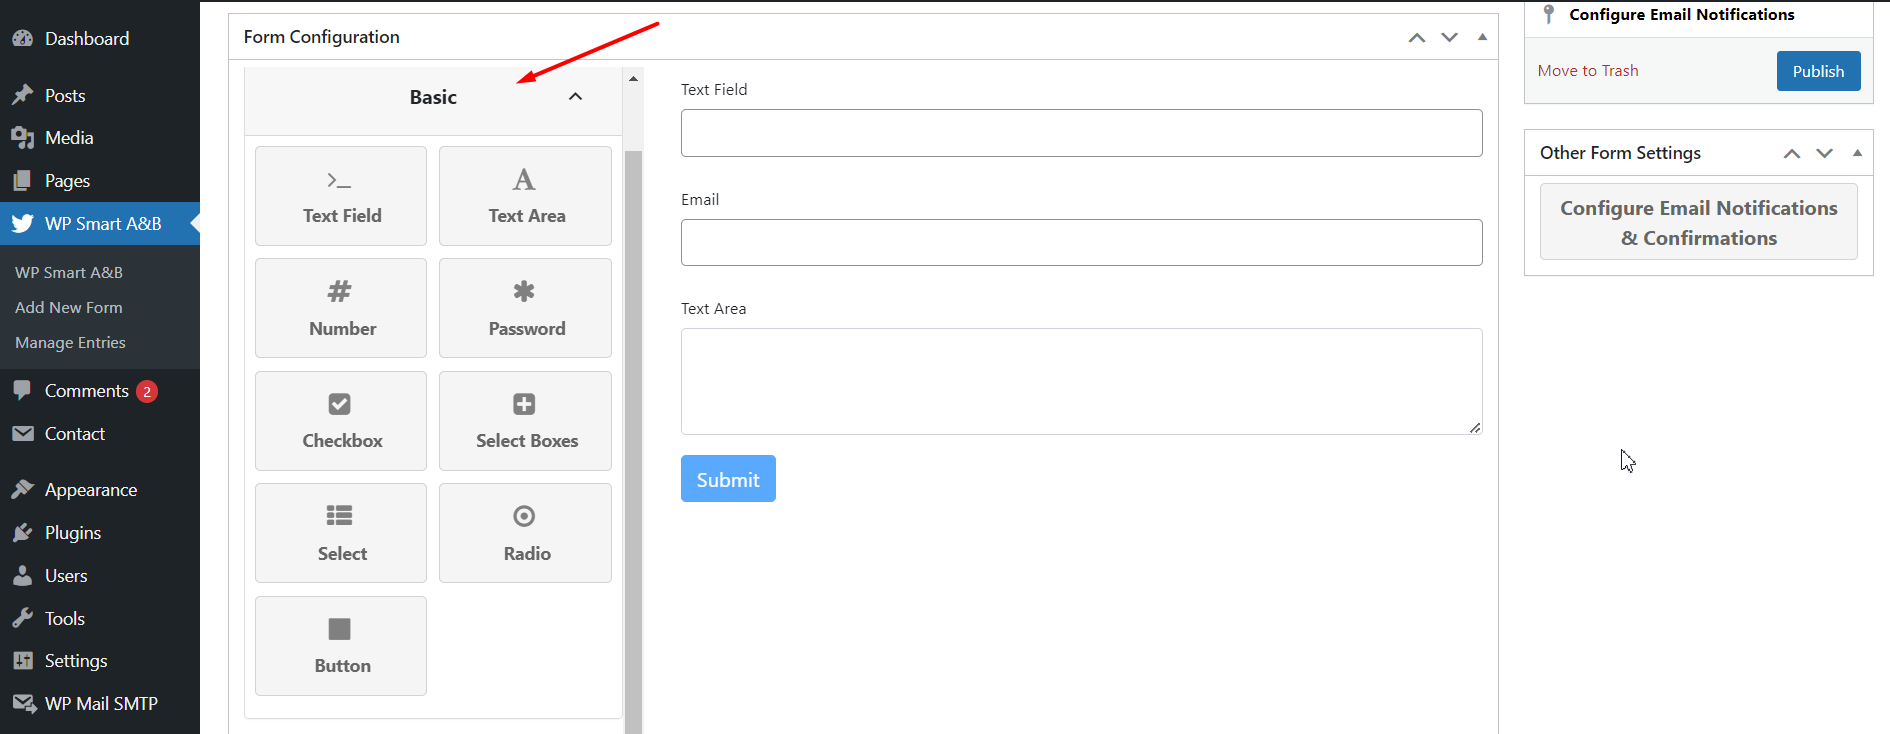
- Text Field: Create a text input field.
- Text Area: For longer text input.
- Number: Input for numerical values.
- Password: Field for password entry.
- Checkbox: For multiple selections.
- Select Boxes: Dropdown menus for multiple selections.
- Select: Single dropdown menu for selection.
- Radio: For single-choice options.
- Button: Action buttons.
Advanced
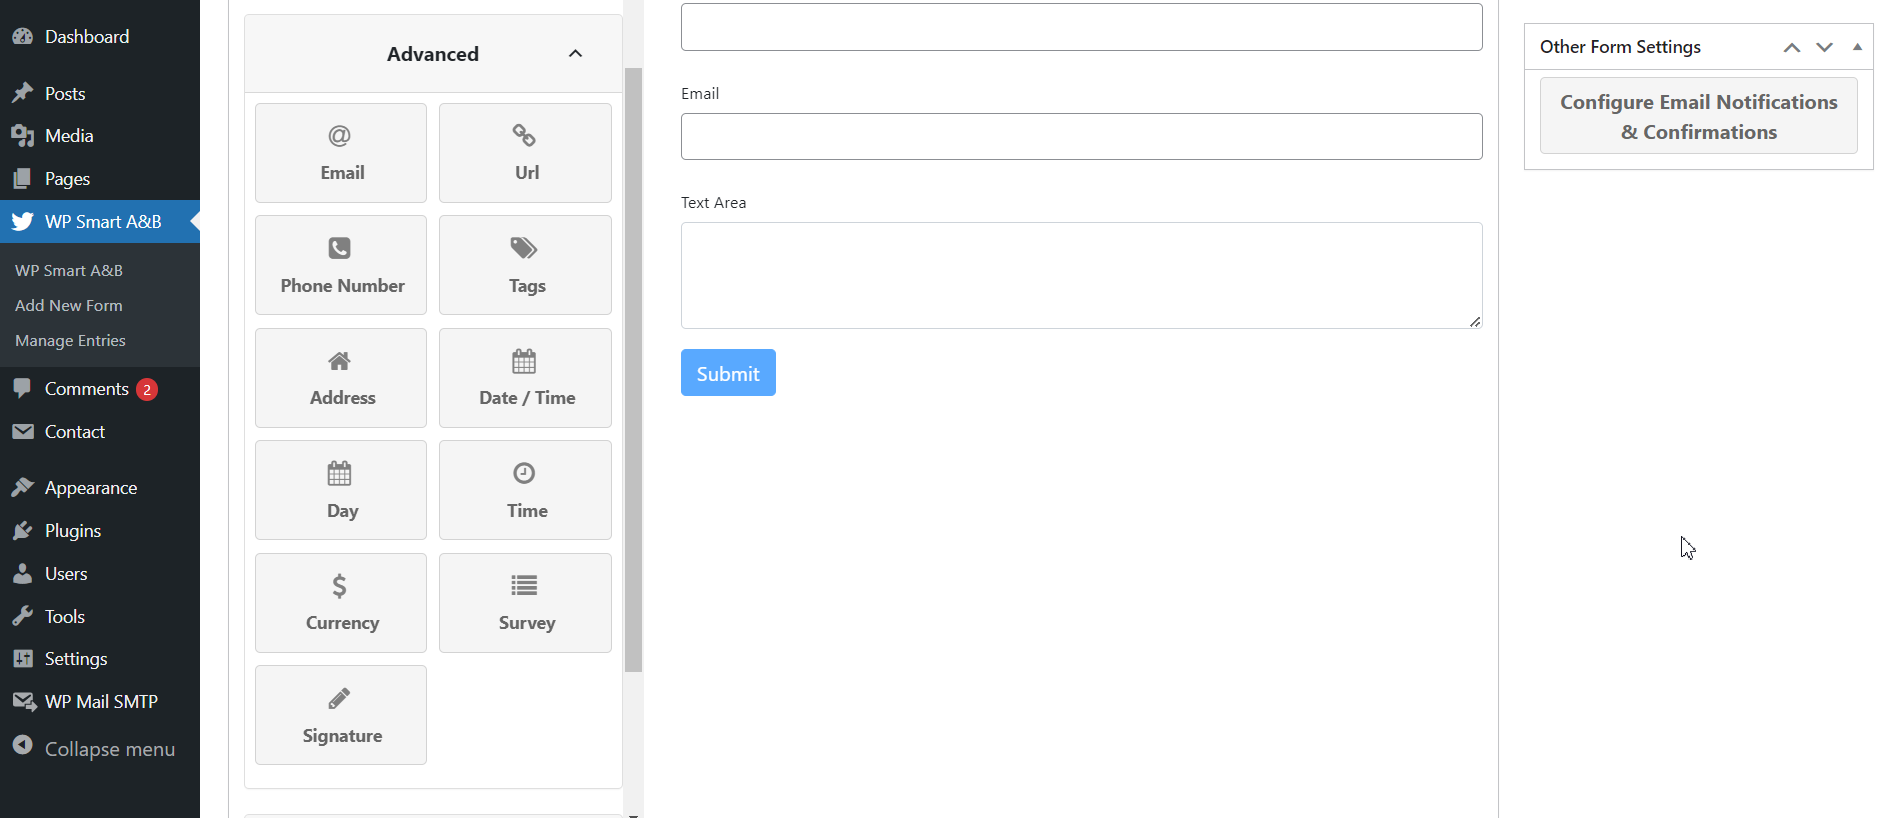
- Email: Input for email addresses.
- URL: For web URLs.
- Phone Number: Input for phone numbers.
- Tags: For tagging or categorizing.
- Address: Input for addresses.
- Date / Time: Fields for date and time input.
- Day: Input for selecting a day.
- Time: Input for selecting a time.
- Currency: Field for currency values.
- Survey: For survey-related inputs.
- Signature: For capturing signatures.
Layout
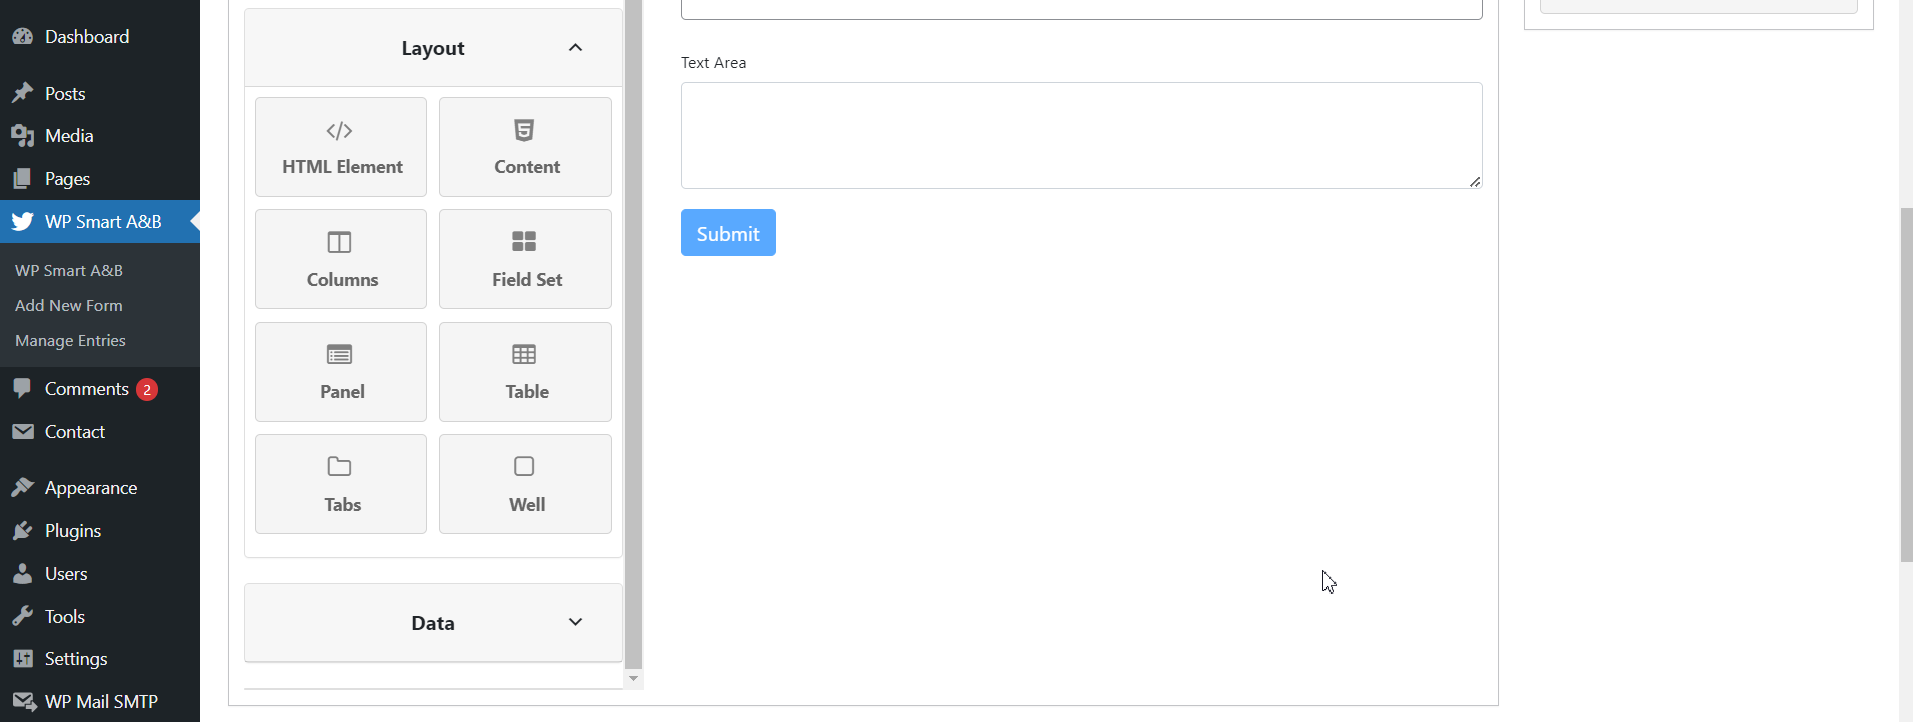
- HTML Element: Custom HTML elements.
- Content: For adding content blocks.
- Columns: Layout with multiple columns.
- Field Set: Grouping of related fields.
- Panel: For organizing fields in panels.
- Table: For tabular data.
- Tabs: For tabbed content sections.
- Well: Styled container for content.
Data
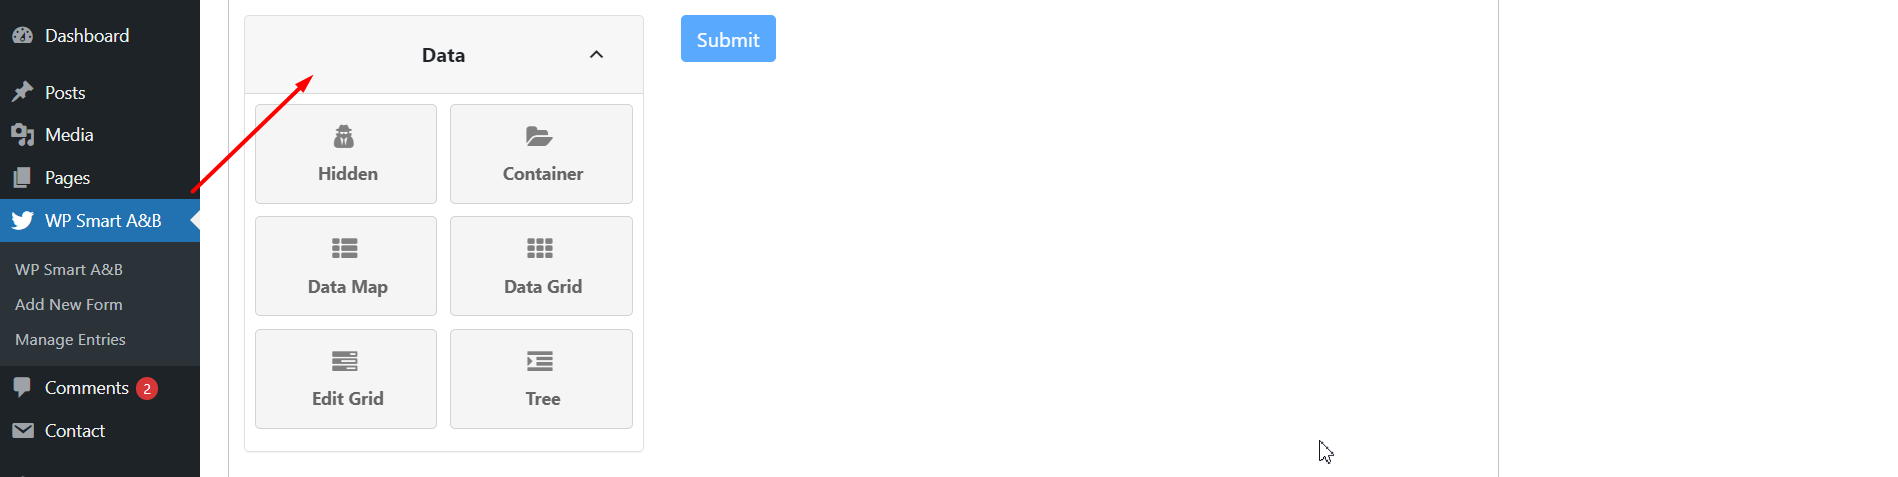
- Hidden: Hidden fields for storing data not visible to users.
- Container: Grouping of fields into containers.
- Data Map: Mapping of data fields.
- Data Grid: Grid layout for data display.
- Edit Grid: Editable grid layout.
- Tree: Hierarchical data display.
General
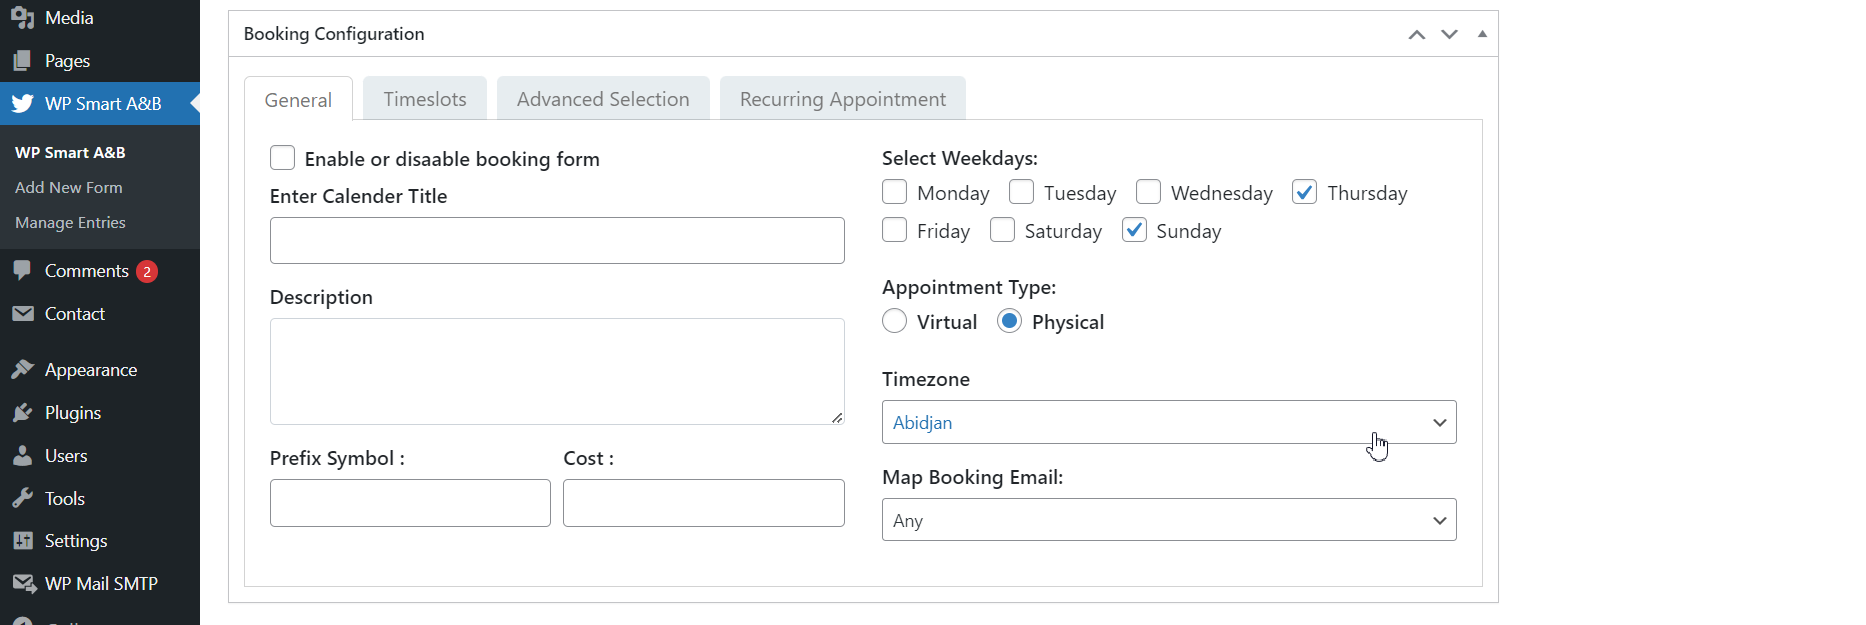
- Enable or Disable Booking Form: Option to enable or disable the booking form.
- Enter Calendar Title: Input field for the calendar title.
- Description: Field to enter a description for the booking form.
- Prefix Symbol: Input field to enter a prefix symbol.
- Cost: Input field to specify the cost.
- Select Weekdays: Multiple selection options for weekdays.
- Monday: Option to select or not select.
- Tuesday: Option to select or not select.
- Wednesday: Option to select or not select.
- Thursday: Option to select or not select.
- Friday: Option to select or not select.
- Saturday: Option to select or not select.
- Sunday: Option to select or not select.
- Appointment Type: Option to enable one type of appointment.
- Virtual: Enable virtual appointments.
- Physical: Enable physical appointments.
- Timezone: Dropdown to select the timezone.
- Map Booking Email: Option to select the email form.
Timeslots
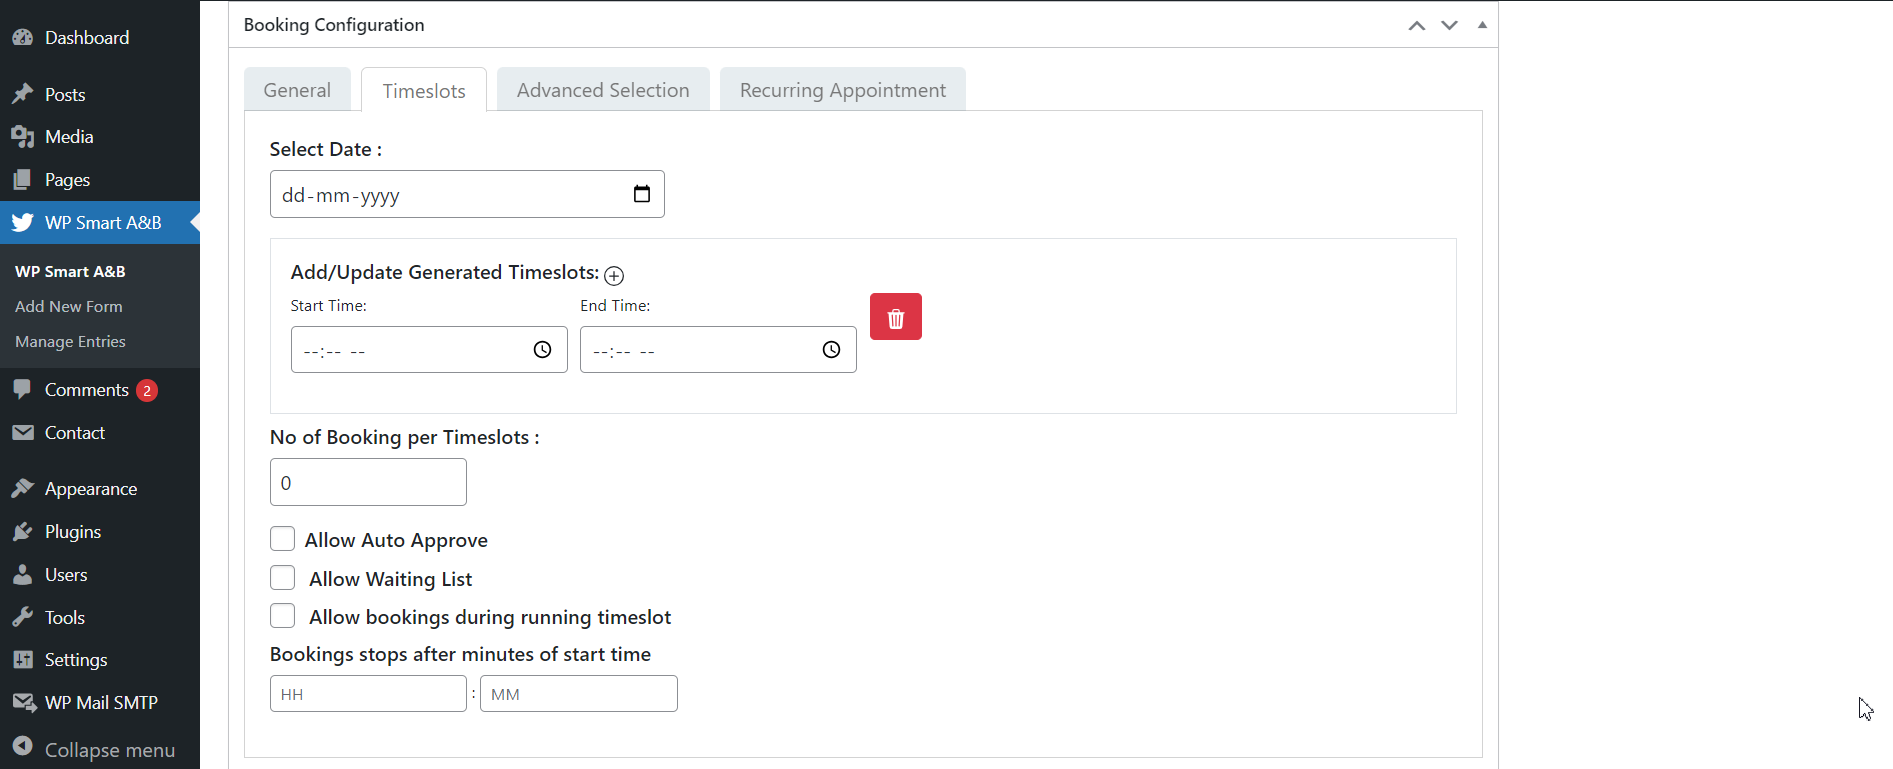
- Select Date: Date picker to select a date.
- Add/Update Generated Timeslots:
- Start Time: Time picker to set the start time.
- End Time: Time picker to set the end time.
- Number of Bookings per Timeslot: Input field to specify the number of bookings allowed per timeslot.
- Allow Auto Approve: Toggle on/off for auto-approving bookings.
- Allow Waiting List: Toggle on/off for allowing a waiting list.
- Allow Bookings During Running Timeslot: Toggle on/off for allowing bookings during an ongoing timeslot.
- Bookings Stop After Minutes of Start Time:
- HH: Input for hours.
- MM: Input for minutes.
- Advanced Selection
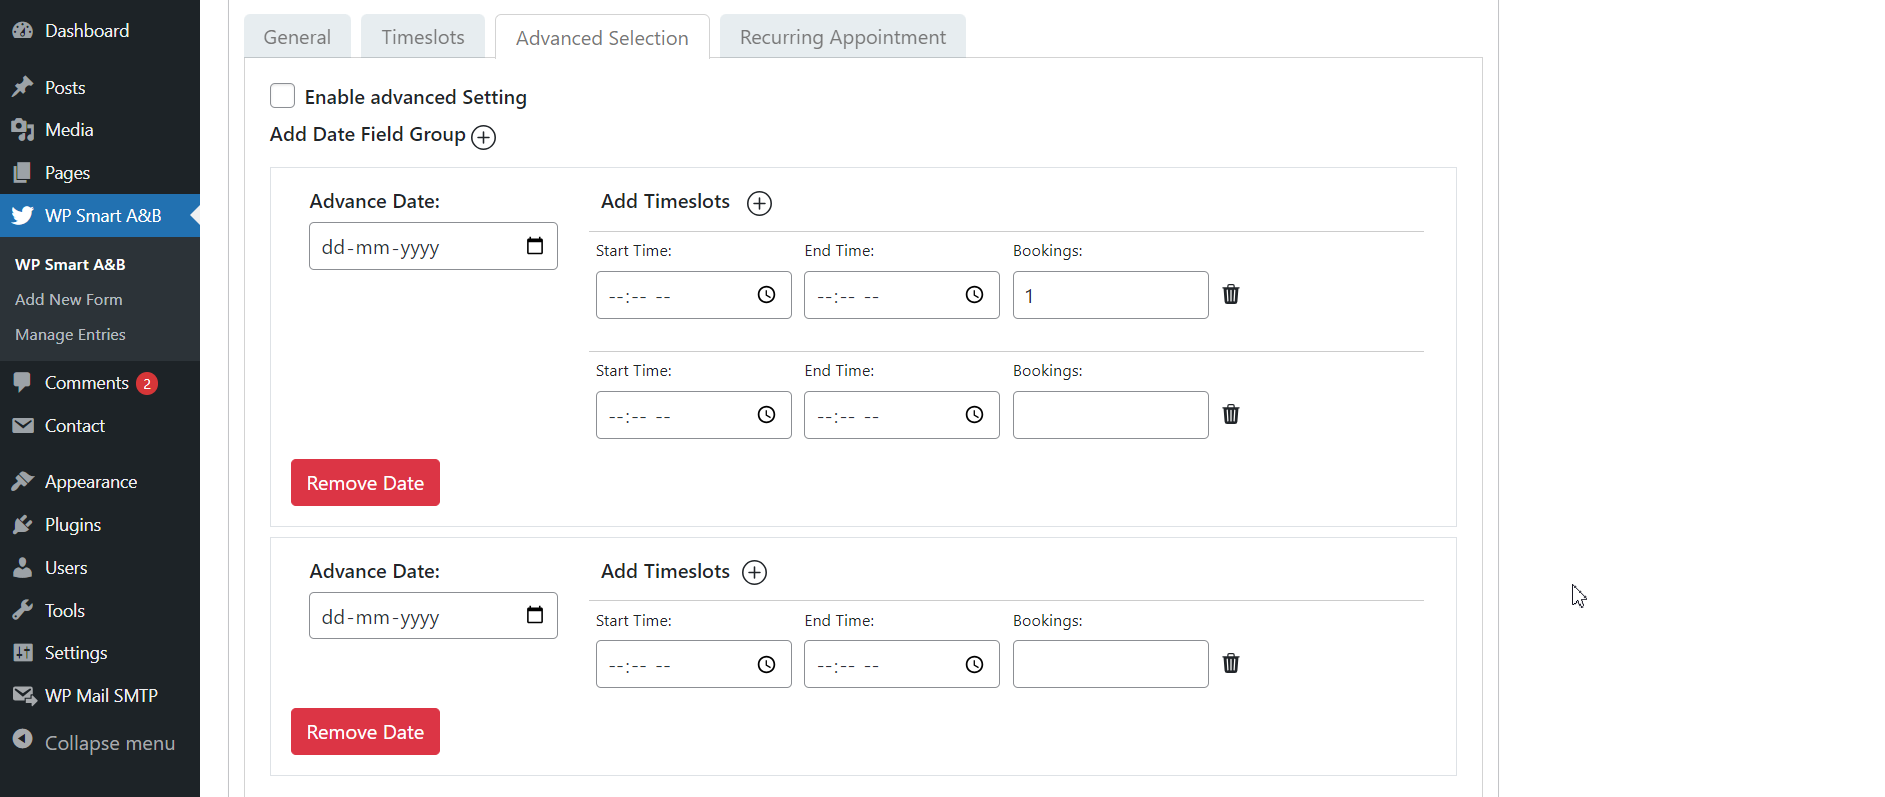
- Enable Advanced Settings: Toggle on/off for advanced settings.
- Add Date Field Group:
- Advance Date: Input field for entering a date.
- Add Timeslots: Option to add multiple timeslots.
- Start Time: Time picker to select the start time.
- End Time: Time picker to select the end time.
- Bookings: Input to enter the number of bookings (e.g., 1, 2, 3).
Recurring Appointment
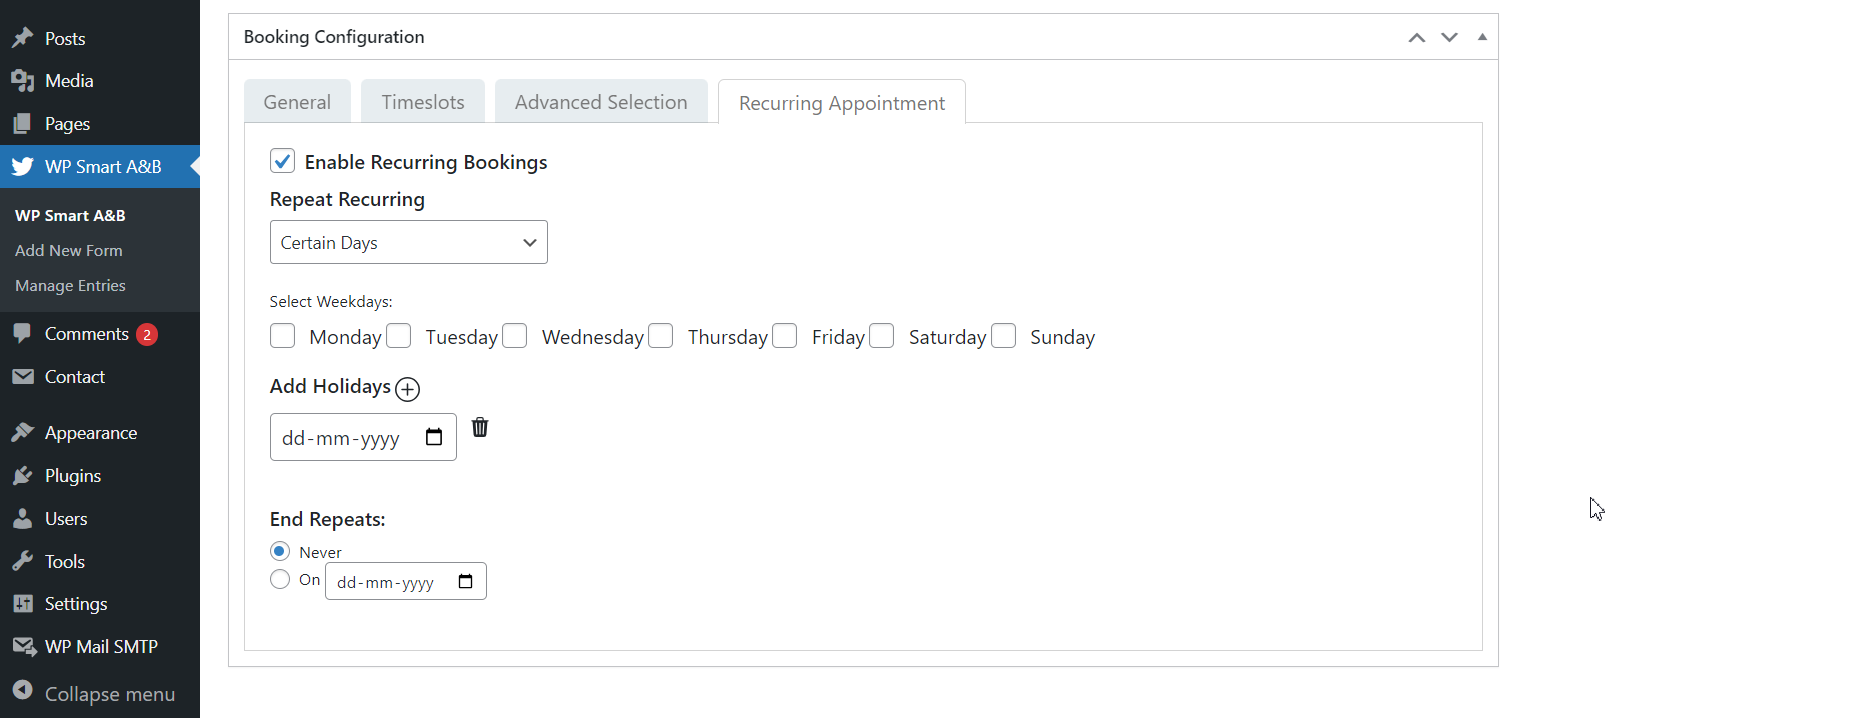
- Enable Recurring Bookings: Option to enable recurring bookings.
- Repeat Recurring:
- Daily: Option to repeat daily.
- Every Weekend: Option to repeat every weekend.
- Every Weekday: Option to repeat every weekday.
- Certain Days: Option to repeat on specific days.
- Select Weekdays: Multiple selection options for specific weekdays.
- Monday: Option to select or not select.
- Tuesday: Option to select or not select.
- Wednesday: Option to select or not select.
- Thursday: Option to select or not select.
- Friday: Option to select or not select.
- Saturday: Option to select or not select.
- Sunday: Option to select or not select.
- Add Holidays: Option to select multiple holidays.
- Select Date: Date picker to select holiday dates.
- End Repeats:
- Never: Option to never end repeating.
- On Date: Date picker to select an end date for repeating.
Field Mapping
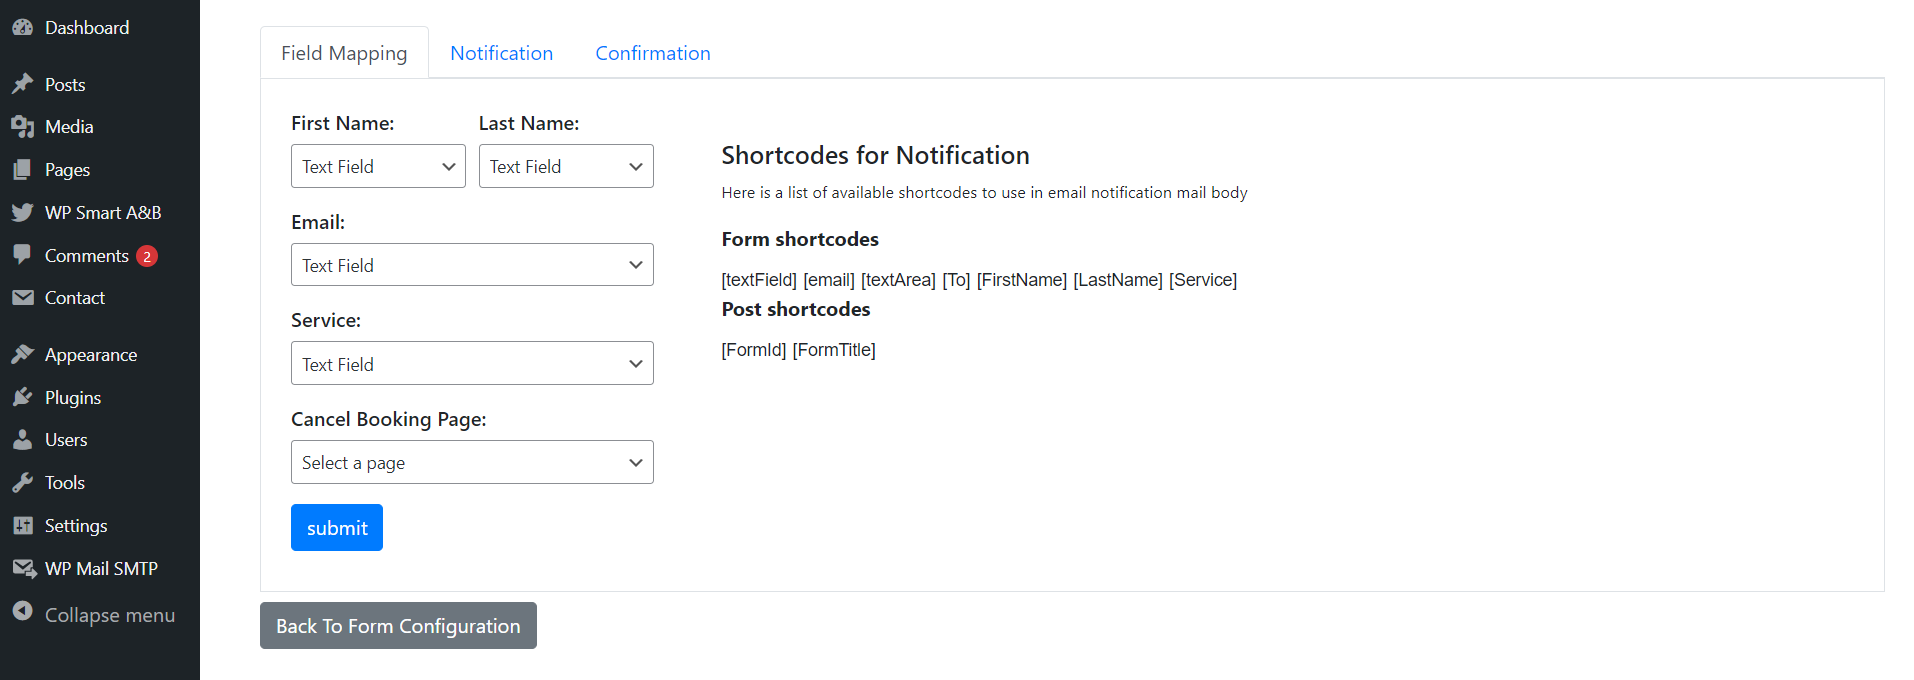
- First Name: Select from a list of form fields.
- Last Name: Select from a list of form fields.
- Email: Select from a list of form fields.
- Service: Select from a list of form fields.
- Cancel Booking Page: Select a page for cancellation.
Shortcodes for Notification
- Available Shortcodes for Email Notification:
- Form Shortcodes:
-
[textField] [email] [textArea] [To] [FirstName] [LastName] [Service]
- Post Shortcodes:
-
[FormId] [FormTitle]
Notification

- Add New Notification
- General Notification Setting:
- Notification Name: Enter the notification name.
- State:
- Disable: Option to select or not select.
- Enable: Option to select or not select.
- Type: Select one option:
- Booked
- Pending
- Cancelled
- Approved
- Waiting
- Submitted
- Email Settings:
- To: Enter the recipient's email address.
- From: Enter the sender's email address.
- Reply To: Enter the reply-to email address.
- Bcc: Enter Bcc email addresses.
- Cc: Enter Cc email addresses.
- Subject: Enter the email subject.
- Mail Body: Compose the email body.
- Use HTML Content Type: Option to use HTML for the email content.
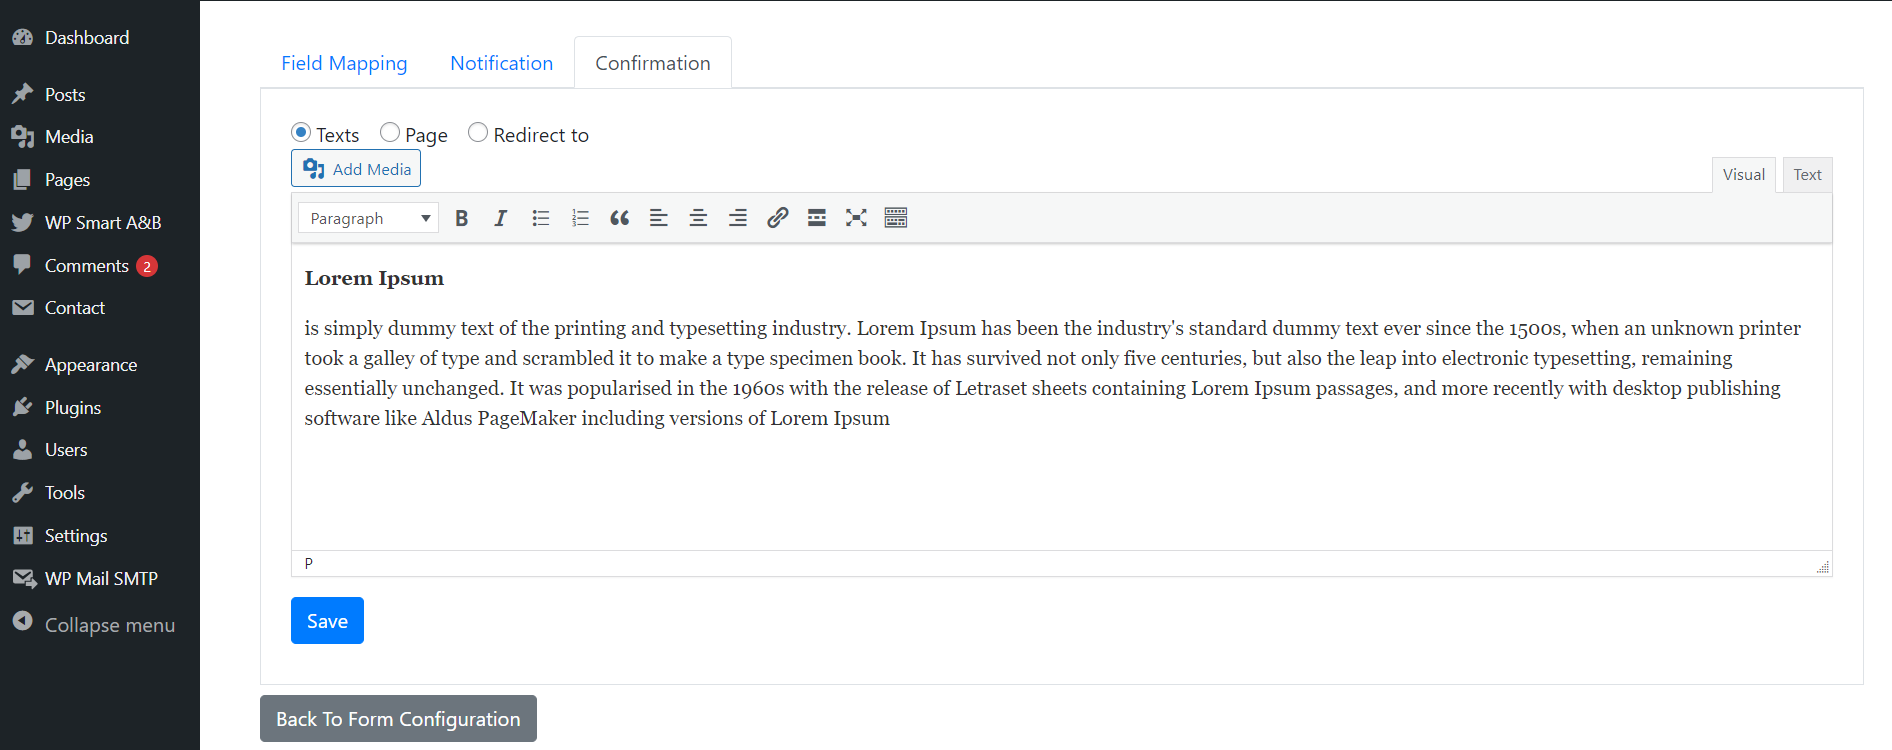
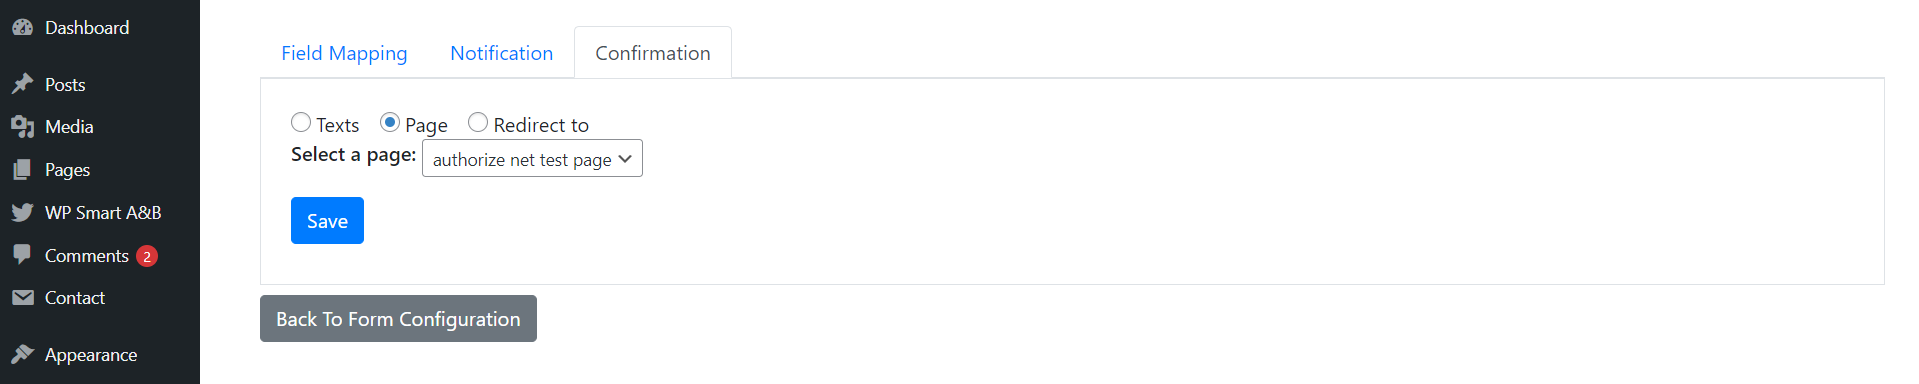
Confirmation
- Texts: Enter confirmation text.
- Pages: Select a page for confirmation.
- Redirect to: Add a link for redirection (e.g., google.com).

For Manage Entries
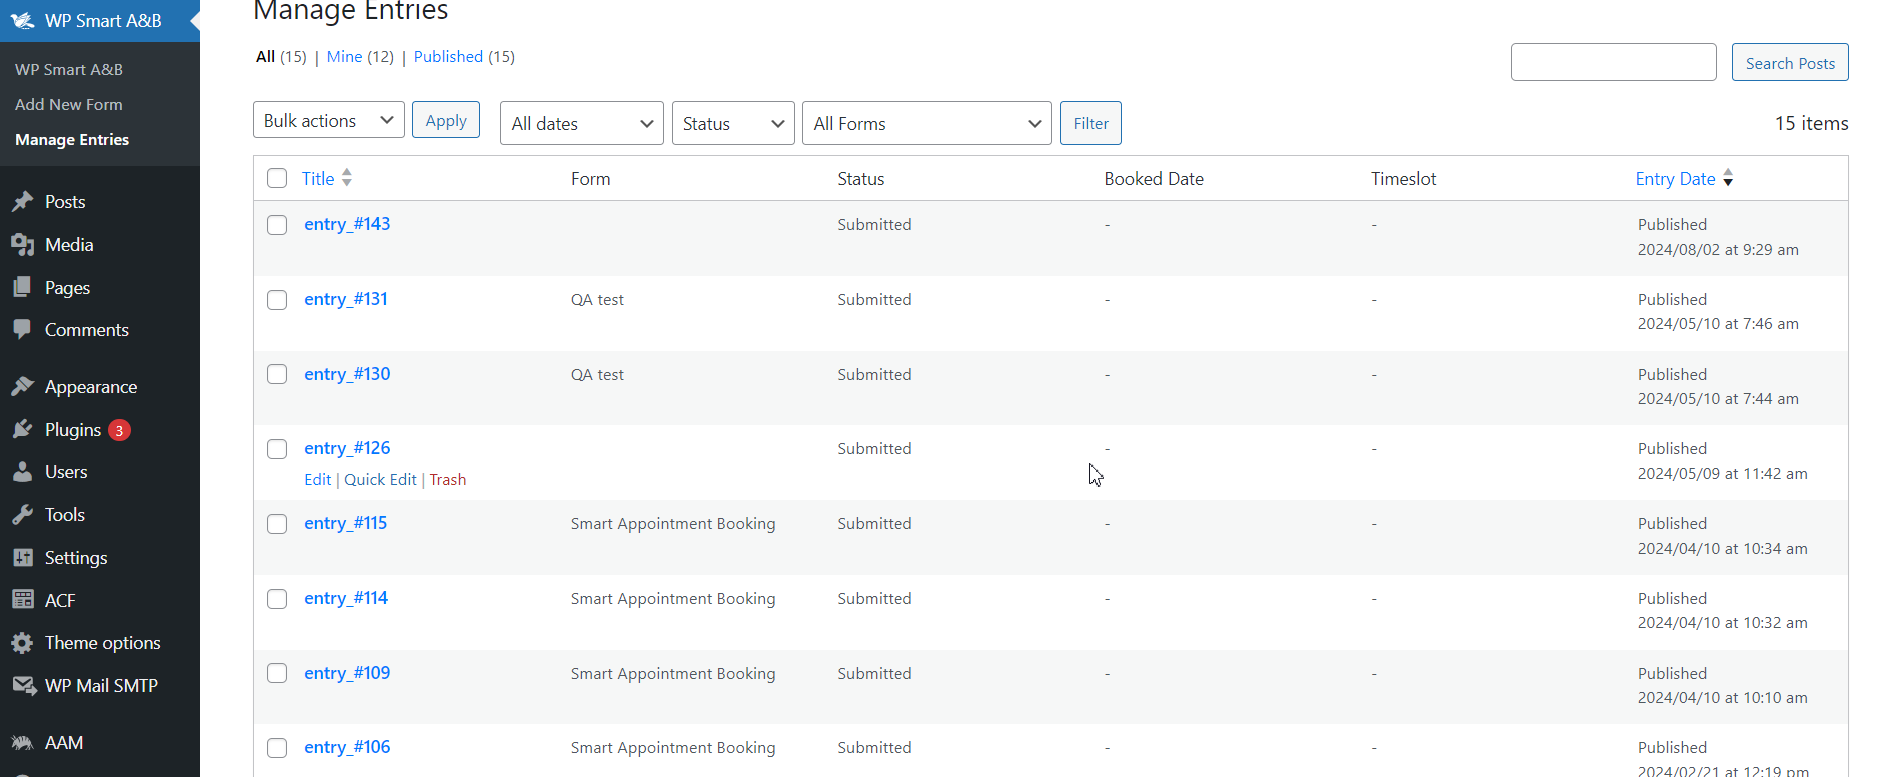
Title : entry_#number (e.g., entry_#001)
Form: Displays the form name.
Status: Current status of the booking, which can be one of the following:
- Booked
- Pending
- Cancelled
- Approved
- Waiting
- Submitted
Booked Date: The date on which the booking was made.
Timeslot: The selected timeslot for the booking.
Date: The specific date of the appointment or event.
For Manage Entries Details
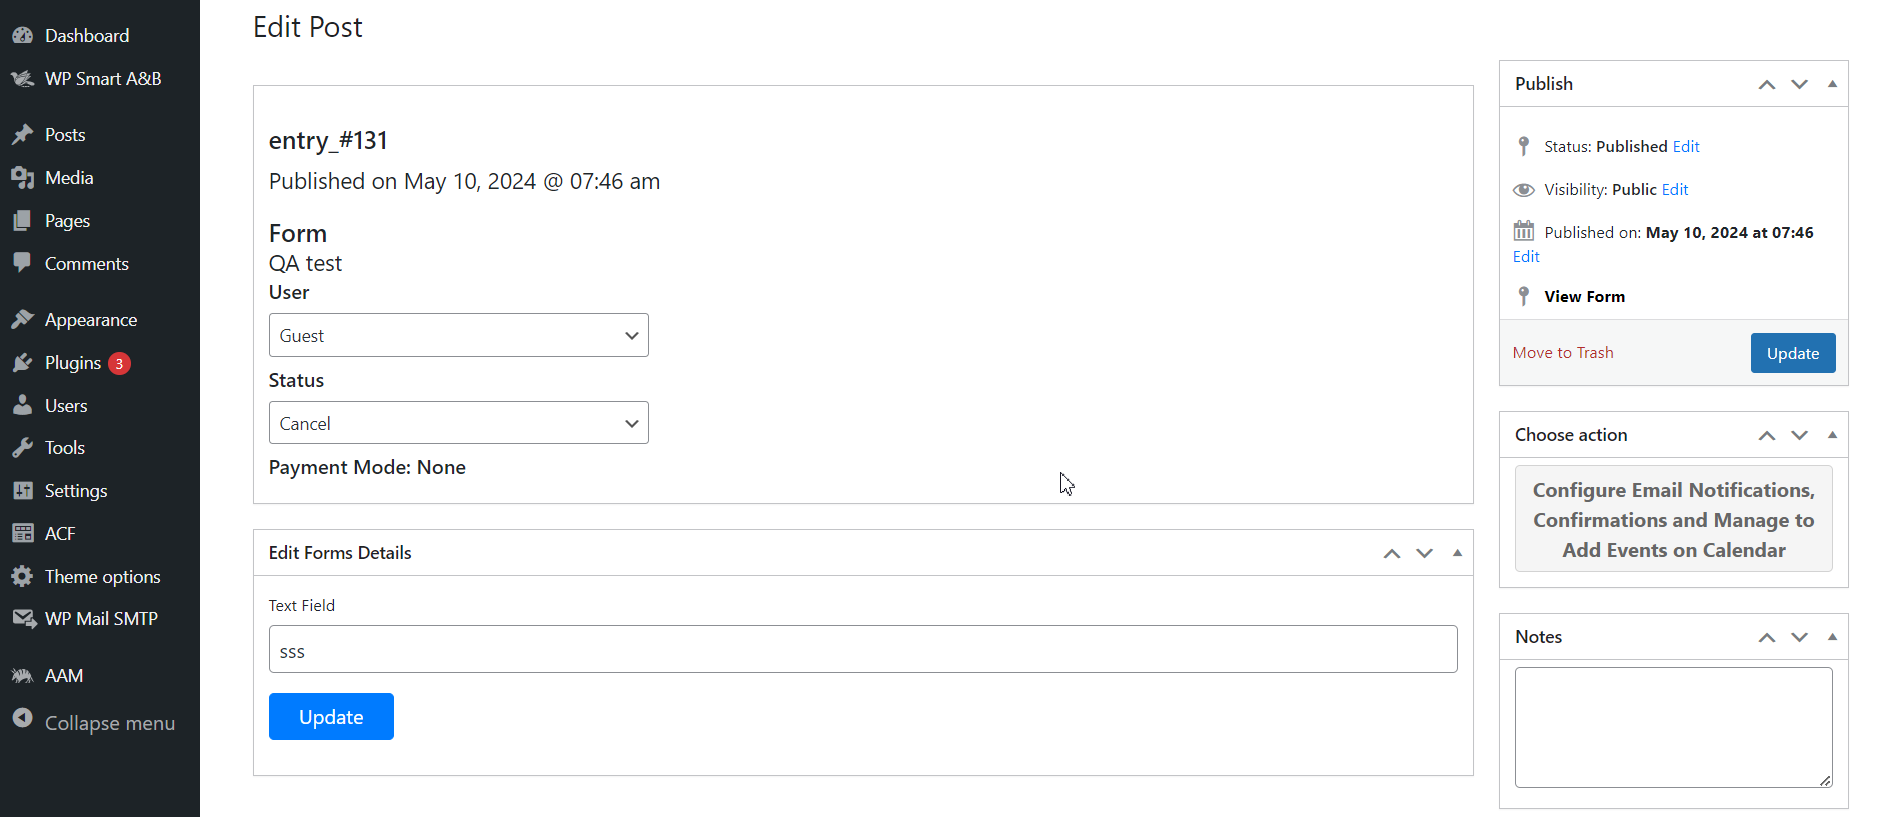
Booking Entry Details
- Entry ID: entry_#131
- Published On: Form submission date (e.g., May 10, 2024 @ 07:46 AM)
- Form: Displays the name of the associated form.
- User: Displays the name of the user who made the booking.
- Status
-
Booked
-
Pending
-
Cancelled
-
Approved
-
Waiting
-
Submitted
-
Form Details
- Display the detailed information entered in the form.
Get Support
FAQs
How can I manage and track booking entries from the admin panel?
To manage and track booking entries:
- Log in to the admin panel and navigate to the "Bookings" section.
- Here, you can view all booking entries, update statuses, and modify booking details.
- You can also reschedule or cancel bookings and send manual notifications to customers as needed.
- The admin panel provides a comprehensive view, allowing you to stay in control of all bookings and appointments.
How does the waitlist feature work for fully booked appointments?
The waitlist feature allows customers to join a waitlist when an appointment is fully booked. When a slot becomes available:
- Admins can approve bookings from the waitlist.
- Customers on the waitlist will receive a notification informing them of the available slot.
- The customer can then confirm their booking.
Can I offer both physical and virtual appointments through the booking forms?
Yes, you can offer both physical and virtual appointments. When creating a booking form, you can specify whether the appointment is physical or virtual. For virtual appointments, you can provide Google Meet or Zoom links, which will be shared with customers via email upon successful booking.
How do I customize the thank-you message and set up page redirection after form submission?
To customize the thank-you message and set up page redirection:
- Navigate to the form settings in the admin panel.
- Select the "Thank-You Message" section to enter your custom message.
- In the "Redirection" section, enter the URL where you want users to be redirected after form submission.
- Save your changes.
Change log
version 1.0.2
- The issue on the backend has been fixed.
version 1.0.1
- Issue Fixed “Form Is not being saved”
version 1.0
- 1.0 is Initial Release